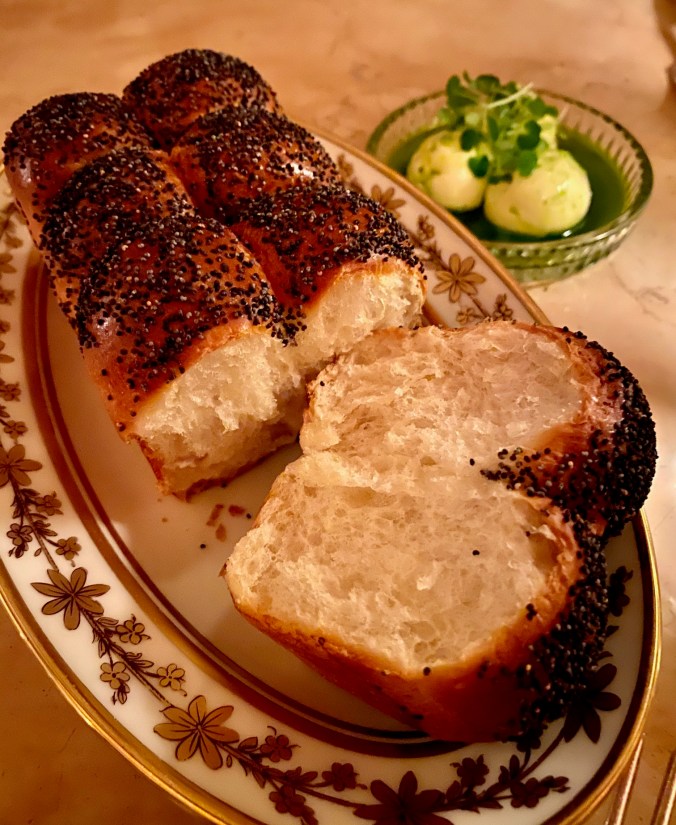
My favorite quarantine recipes Part VIII

IMG_4733

Pretzel Rolls

In my 8th week of cooking at home without a single repetition, an old friend from junior school dared me to go vegetarian for a whole week. Challenge accepted. Dinner is served.


SUNDAY

Eating gnocchi is a lot like a water slide. They both go down easily and once you take the first plunge – you never want to stop. And while most menus predictably resort to a basil pesto as the perfect gnocchi partner, I prefer using asparagus for a refreshing twist. See if you agree.

IMG_4689

Ricotta Gnocchi with Asparagus Pesto

RICOTTA GNOCCHI

INGREDIENTS

  • 2 lbs potatoes, boiled in their skins until tender
  • 1 1/2 cups flour
  • Salt and pepper to taste
  • 1 egg
  • 1/2 cup Ricotta cheese
  • 1/4 cup oil

DIRECTIONS

Allow the boiled potatoes to cool slightly, then peel and rice the potatoes. Spread the riced potatoes out on a sheet pan to cool completely.
In a mixing bowl, mix egg and ricotta together, seasoning with salt and pepper.
Place the cooled, riced potatoes into a separate bowl and add the egg ricotta mixture.
Gradually add the flour to the potato mixture, stopping when the dough is tender and pliable.
Working in sections, roll the gnocchi dough into a 1/2 inch thick rope on a lightly floured surface. Then cut into 1 inch pieces. Using the back of a floured dinner fork, place the right side of each gnocchi on the fork and roll down the fork to imprint the tines into the dough. Repeat with remaining dough.
Bring a large pot of salted water to a boil, and working in batches with an ice bath on the side, blanch gnocchi till they float to the surface of the water. Remove from the pot and transfer into ice bath.
Once chilled (just) remove gnocchi from the ice bath and place a single layer on a sheet pan until all the gnocchi have been blanched.
Place a large sautee pan over medium heat. Add the oil and then add the gnocchi when the oil starts to ripple. Sautee gnocchi in batches, tossing to coat and allowing to brown.
Place a sheet pan and keep in a low oven until all the gnocchi have been sauteed. Serves 4.

ASPARAGUS PESTO

INGREDIENTS

  • Salt
  • 1 pound asparagus, trimmed and cut into 2-inch segments
  • 1 clove garlic, or more to taste
  • ¼ cup pine nuts
  • ¼ cup olive oil, or more as desired
  • ¾ cup freshly grated Parmesan cheese
  • Freshly ground black pepper
  • Juice of 1/2 lemon, or to taste

DIRECTIONS

Bring a large pot of water to a boil and salt it. Add the asparagus and cook until fully tender but not mushy, 8 to 10 minutes. Drain well, reserving some of the cooking liquid, and let the asparagus cool slightly.

Transfer the asparagus to a food processor and add the garlic, pine nuts, 2 tablespoons of the oil, Parmesan, a pinch of salt and a couple of tablespoons of the cooking liquid. Process the mixture, stopping to scrape down the sides of the container if necessary, and gradually add the remaining oil and a bit more of the reserved cooking liquid to moisten if necessary. Add the lemon juice and season with salt and pepper to taste, pulse one last time, and serve over pasta, fish or chicken (or cover and refrigerate for up to a day).


MONDAY

If you’re an incurable Tapas enthusiast like me, you’re probably also a big fan of Patatas Bravas. Every time I eat them, I swear to myself that someday I’m going to make an entire meal of Spain’s crispiest potatoes with an infinite amount of those delectable yellow and orange sauces. And that’s exactly what happened this week.

IMG_4697

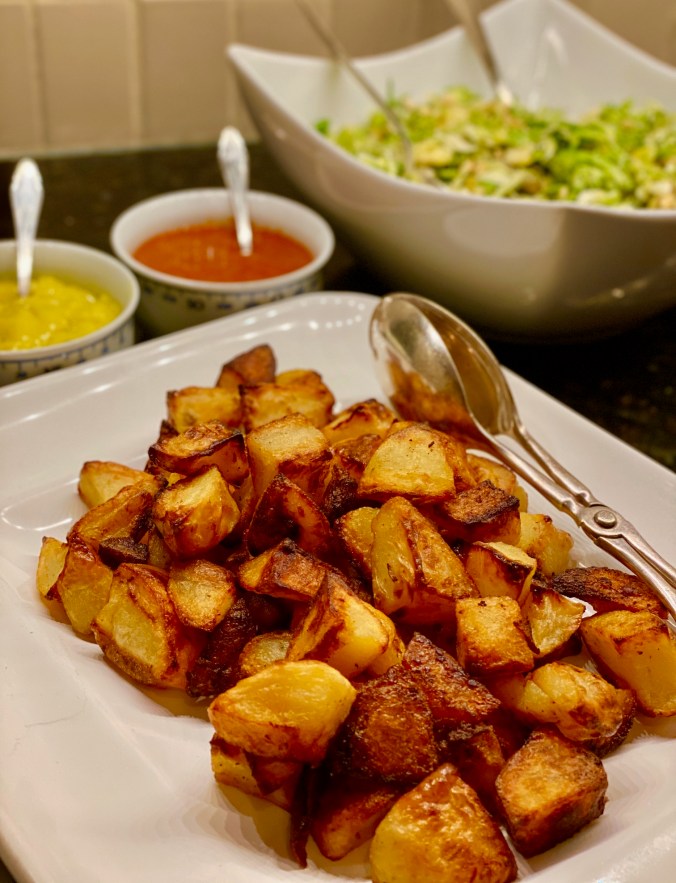
Patatas Bravas with Two Sauces

PATATAS BRAVAS WITH TWO SAUCES

INGREDIENTS

For the potatoes:

  • 2 pounds yellow-fleshed or russet potatoes, peeled and cut in 1 1/2-inch chunks
  • 1 tblspn Kosher salt
  • 1/3 cup extra-virgin olive oil
  • 1 head garlic, separated into cloves but not peeled

For the Salsa Brava:

  • 2 tablespoons extra-virgin olive oil
  • 2 garlic cloves, minced
  • 2 tablespoons all-purpose flour
  • 1 tablespoon tomato paste
  • 1 tablespoon pimentón dulce, (or use sweet paprika)
  • 1 teaspoon pimentón picante, (or use 1/4 tsp cayenne)
  • 1 – 1 1/2 cups chicken broth
  • 1 tablespoon sherry vinegar
  • Kosher salt

For the Allioli:

  • 1 egg yolk
  • 2 garlic cloves, finely minced or grated
  • 3/4 cup extra-virgin olive oil
  • Kosher salt and black pepper

DIRECTIONS

Heat oven to 450 degrees. Put potato chunks in a large bowl, season with salt and toss to coat. Leave for a few minutes to let potatoes absorb salt. Add olive oil and unpeeled garlic cloves and toss to coat well.

Transfer potatoes, garlic cloves and oil to a large cast-iron skillet or heavy roasting pan. Make sure to have potatoes in a single layer without crowding. (If necessary, use two pans.) There should be a good 1/4-inch oil in the bottom of the pan. Add more if required.

Place pan in oven and roast for 25 to 30 minutes, or until potato chunks are well browned on the bottom. With a metal spatula, turn chunks over. Reduce heat to 400 degrees, and continue roasting until potatoes are well browned and crisp, about another 25 to 30 minutes.

While potatoes are roasting, make the two sauces: For the salsa brava, put 2 tablespoons olive oil in a small saucepan over medium heat. Add garlic and let sizzle without browning, then stir in flour and let mixture sizzle. Stir in tomato paste, pimentón dulce and pimentón picante, then add chicken broth gradually, stirring well as the sauce thickens. Bring to a gentle simmer, add vinegar and cook for 5 minutes until the sauce has a gravylike consistency, but isn’t too thick. Thin with a little more broth or water, if necessary. Season with salt to taste.

For the allioli, whisk egg yolk and garlic together in a small bowl. Add oil a few drops at a time, whisking vigorously with each addition. As the sauce thickens, add olive oil a teaspoon at a time. If the aioli gets too thick, whisk in 1 tablespoon water, then continue to whisk in remaining oil. The finished sauce should have the consistency of softly whipped cream. Season to taste with salt and pepper.

When potatoes are ready, use spatula to transfer to a baking sheet lined with paper towels to blot, then to a warm serving dish. Serve warm with the two sauces. Serves 2.

TUESDAY

I was going to make a Ratatouille, but that would have been far too predictable. So instead I made this Summer Squash Gratin which might look cute and cuddly, but thanks to the Gruyere and leeks, has a honkin’ blast of flavor you don’t see coming.

IMG_4709

Summer Squash Gratin

SUMMER SQUASH GRATIN

INGREDIENTS

  • 1/4 cup extra-virgin olive oil
  • 3 small leeks (1/2 pound), white and tender green parts thinly sliced into rounds
  • 1/4 cup dry white wine
  • 3 medium zucchini, cut lengthwise into 1/8-inch-thick slices, preferably on a mandolin
  • 3 medium yellow summer squash, cut lengthwise into 1/8-inch-thick slices, preferably on a mandolin
  • Kosher salt
  • Pepper
  • 1 cup finely shredded Gruyère (about 2 ounces)
  • 1 plum tomato, very thinly sliced crosswise
  • Flaky sea salt and crusty bread, for serving

DIRECTIONS

Preheat the oven to 425°.
In a large skillet, heat 1 tablespoon of oil over moderately high heat. Add the leeks and cook, stirring occasionally, until softened, about 3 minutes. Add the wine and cook until evaporated, about 2 minutes. Spread in a 9-inch round baking dish

Meanwhile, on 2 large baking sheets, spread the zucchini and yellow squash and brush with the remaining 3 tablespoons of oil; season with salt and pepper. Sprinkle with the cheese and let sit until slightly softened, about 5 minutes.

Tightly roll 1 piece of zucchini and set it on the leeks in the center of the dish. Working outward from that center slice, continue rolling and coiling additional pieces of zucchini and yellow squash until you reach the edge of the baking dish. Season the tomato slices with salt and pepper, then tuck in intervals between the zucchini and squash. Scrape any cheese off of the baking sheets and sprinkle on top.

Bake for 30 minutes, until the zucchini and squash are tender and browned in spots. Sprinkle with sea salt. Let cool slightly, then serve with crusty bread. Serves 4.

WEDNESDAY

Chances are you’ve eaten a whole-roasted cauliflower at a restaurant many times before, but cooking it at home is a good and bad news story: The good news is that it’s as delicious as it looks with a crispy crust and a heart of gold, but the bad news is that your oven will need to undergo a major top-to-bottom spring cleaning session immediately thereafter. (Um…thanks to the anchovies, this sauce is vegetarian adjacent, but if you’re a purist, you can use pretty much anything from Green goddess to Romesco.)

IMG_4715

Whole Roasted Cauliflower

WHOLE ROASTED CAULIFLOWER

INGREDIENTS

For the cauliflower:

  • 1 large cauliflower
  • Olive oil
  • Salt

For the sauce:

  • ⅓ cup blanched almonds
  • 6 to 10 anchovy fillets (optional)
  • 2 garlic cloves, peeled
  • 2 tablespoons unsalted butter, at room temperature
  • ½ cup extra-virgin olive oil, plus extra for basting
  • 2 teaspoons wine vinegar (white or red), more to taste
  • ½ cup coarsely chopped parsley, mint, tarragon, cilantro or a combination
  • ½ to 1 teaspoon red pepper flakes (optional)
  • Salt and ground black pepper

DIRECTIONS

Heat the oven while you prepare the cauliflower: Place a heavy oven-proof skillet or a baking sheet in the oven and turn the heat to 375 degrees. Place a small pan of hot water on the floor of the oven, to create steam.

Break off and discard the outer leaves from the cauliflower. Cut off the bottom of the stem, and then use the tip of a small, sharp knife to cut off the leaves close to the stem. Carefully cut out the hard core of the cauliflower, near the bottom. Leave the main stem intact and make sure not to cut through any of the florets.

Rinse the cauliflower (leave the water clinging to the outside) and place on a work surface, core side up. Drizzle with olive oil and use your hands to rub over the cauliflower until evenly coated. Sprinkle with salt.

Place the cauliflower on the hot pan in the oven, core side down, and cook until very tender all the way through when pierced with a knife, at least 1 hour or up to 2 hours. During the cooking, baste 2 or 3 times with more olive oil. It should brown nicely. If you have a convection feature, use it toward the end of baking to brown the crust.

Make the sauce: In a small frying pan, toast nuts over low heat, shaking often, just until golden and fragrant. Set aside to cool.

Soak anchovies, if using, for 5 minutes in cool water. Rinse and set aside on paper towels.

In a food processor, combine almonds, anchovies, garlic and butter and pulse until smooth. Mix in oil, then vinegar. Mix in herbs and red pepper flakes, if using. Season to taste with salt and pepper. Set aside.

When cauliflower is tender, remove from the oven. (If desired, run it briefly under the broiler first to brown the surface; there is no need to do this if you used convection.)

Serve cauliflower in the skillet or from a serving plate. Cut into wedges and spoon sauce around each wedge. Serves 2 – 4 depending on the size of the cauliflower.

THURSDAY

For several reasons I’d rather not get into, let’s just say that I have a “hot” kitchen. And so, when the weather heats up I tend to opt for room temperature dishes to stay cool. This hugely popular wheatberry salad is a great side-dish or an awesome meal on its own.

IMG_4717

Wheatberry Salad with Roasted Squash

WHEATBERRY SALAD WITH ROASTED SQUASH

INGREDIENTS

For the Squash:

  • 3 tablespoons extra-virgin olive oil
  • 2 teaspoons sugar
  • ¾ teaspoon ground cinnamon
  • ¾ teaspoon fine sea salt, more as needed
  • ¼ teaspoon black pepper
  • ⅛ teaspoon cayenne, or to taste
  • 3 pounds winter squash, such as kabocha, carnival or butternut, seeded and cut into 1/2-inch thick slices (leave the peels on or remove as desired)

For the Wheatberries:

  • 1 ½ cups winter wheatberries
  • 2 ½ teaspoons kosher salt, more to taste
  • 2 cups water, more if required.

For the Dressing:

  • 2 tablespoons apple cider vinegar, more to taste
  • 2 garlic cloves, grated on a Microplane or minced
  • ½ teaspoon black pepper
  • 7 tablespoons extra-virgin olive oil, more as needed
  • 3 ounces feta cheese, crumbled (about 3/4 cup)
  • 1/2 cup fresh mint leaves

DIRECTIONS

Heat oven to 450 degrees. Prepare the squash: In a large bowl, mix together olive oil, sugar, cinnamon, salt, pepper and cayenne. Add squash and toss well to coat with the spiced oil. Lay the squash pieces out flat on a rimmed baking sheet.

Roast squash until the bottoms are golden, 10 to 15 minutes. Carefully turn the pieces over and continue to roast until tender, another 10 to 20 minutes.

Add the Wheatberries, salt and water to a saucepan and bring to a solid simmer for about 20 – 25 minutes, until the berries are soft but still chewy. Strain and set aside to cool.

In a large bowl, whisk together vinegar, garlic and pepper. Whisk in olive oil. Add the cooked wheatberries and toss well, adding more oil or salt, or both, if needed.

To serve, spoon the wheatberries on a platter and top with the squash, feta, mint and a drizzle of olive oil. Serves 4.

FRIDAY

If you scroll down a few blogs, you will see that I took a street food tour of Palermo a few months ago. But my very first meal in Sicily was pasta alla Norma. I’ll never forget the medley of flavors that were so much more than the sum of their simple parts. If you can’t find Ricotta Salata, you can always substitute with a hard feta.

IMG_4722

Pasta alla Norma

PASTA ALLA NORMA

INGREDIENTS

  • 1 large eggplant (1 1/4 to 1 1/2 pounds), cut into 1/2-inch cubes
  • Kosher salt
  • 3 tablespoons olive oil
  • 4 medium garlic cloves, mined or pressed through garlic press (about 4 teaspoons)
  • 2 anchovy fillets, minced
  • ½ teaspoon red pepper flakes
  • 1 (28-ounce) can crushed tomatoes
  • 1 pound ziti, rigatoni, or penne
  • 6 tablespoons chopped fresh basil
  • 1 tablespoon extra-virgin olive oil
  • 3 ounces ricotta salata, shredded (a hard feta is a good substitute)

DIRECTIONS

Toss eggplant with 1 teaspoon salt in medium bowl. Line surface of large microwave-safe plate with double layer of coffee filters and lightly spray with nonstick cooking spray. Spread eggplant in an even layer over coffee filters; wipe out and reserve the bowl. Microwave eggplant on high power, uncovered, until dry to touch and slightly shriveled, about 10 minutes, tossing once halfway through to ensure that eggplant cooks evenly. Let cool slightly.

Transfer eggplant to now-empty bowl, drizzle with 1 tablespoon olive oil, and toss gently to coat; discard coffee filters and reserve plate. Heat 1 tablespoon olive oil in 12-inch nonstick skillet over medium-high heat until shimmering but not smoking. Add eggplant and distribute in even layer. Cook, stirring or tossing every 1½ to 2 minutes (more frequent stirring may cause eggplant pieces to break apart), until well browned and fully tender, about 10 minutes. Remove skillet from heat and transfer eggplant to now-empty plate and set aside.

Add remaining 1 tablespoon olive oil, garlic, anchovies, and pepper flakes to now-empty but still-hot skillet and cook using residual heat so garlic doesn’t burn, stirring constantly, until fragrant and garlic becomes pale golden, about 1 minute. Add tomatoes, return skillet to burner over medium-high heat, and bring to boil. Reduce heat to medium and simmer, stirring occasionally, until slightly thickened, 8 to 10 minutes.

Meanwhile, bring 4 quarts water to boil. Add pasta and 2 tablespoons salt and cook until al dente. Reserve ½ cup cooking water; drain pasta and transfer back to cooking pot.

While pasta is cooking, return eggplant to skillet with tomatoes and gently stir to incorporate. Bring to simmer over medium heat and cook, stirring gently occasionally, until eggplant is heated through and flavors are blended, 3 to 5 minutes. Stir basil and extra-virgin olive oil into sauce; season to taste with salt. Add sauce to cooked pasta, adjusting consistency with reserved pasta cooking water so that sauce coats pasta. Serve immediately, sprinkled with ricotta salata. Serves 4.

SATURDAY

In week IV, I bragged about how little stirring my sausage and pepper risotto required. This week I went all-in for the real deal. If you love the taste of sweet corn in spring, you’re going to love this immensely creamy, crunchy and surprisingly hearty dish.

IMG_4730

Corn Risotto

CORN RISOTTO

INGREDIENTS

For the Stock:

  • 2 corn cobs (kernels removed and reserved for risotto)
  • 1 onion, cut into quarters
  • 1 carrot, cut into 1-inch pieces
  • 1 celery rib, cut crosswise into 1-inch pieces
  • Dark green leaves from 1 leek (reserve white and light green parts for risotto)
  • 2 cloves garlic, smashed
  • 1 teaspoon salt
  • 1 teaspoon whole black peppercorns

For the Risotto:

  • 2 tablespoons unsalted butter
  • 1 leek, white and light green parts only, finely chopped
  • 1 teaspoon kosher salt
  • ¼ teaspoon black pepper
  • 1 cup arborio rice
  • ½ cup dry white wine
  • 1 ½ cups raw corn kernels (from about 2 ears corn)
  • 1/4 tsp saffron, crumbled
  • 1 cup grated Parmesan cheese
  • 2 tablespoons minced chives (optional)

DIRECTIONS

For the stock:
Combine all ingredients with 6 cups water in a large pot. Bring to a boil over high heat. Reduce heat so liquid is simmering; cover pot and let simmer for 30 minutes. Strain through a fine-mesh strainer. Add enough water to bring liquid back up to 6 cups.

For the Risotto:
Melt 1 tablespoon butter in a wide, high-sided sauté pan over medium-low heat. Add leek and cook, stirring occasionally, until softened but not browned, about 6 minutes. Season with salt and pepper. Add rice and cook, stirring, until grains look slightly translucent.

Pour in wine and cook, stirring, until it has all been absorbed, about 2 minutes.

Add a ladle of hot corn stock to the rice mixture and cook, stirring constantly, until rice has absorbed all of the stock. Continue cooking, adding ladles of stock whenever rice mixture looks dry and stirring continuously. When half the stock has been added, stir in corn and the saffron. Continue cooking until all of the stock is incorporated, corn is tender and rice is creamy and tender, about 30 to 40 minutes total.

Remove risotto from heat and stir in Parmesan and remaining tablespoon of butter. Cover and let stand for 5 minutes.

Uncover risotto, stir vigorously and season to taste with salt and pepper. Immediately before serving, stir in the chives. Serves 4.

SUNDAY

I improvised this dish from a little bistro in Montreal who must have had a surplus of goat cheese the week I was there, as every egg dish on their Sunday breakfast menu was paired with goat cheese. But hey, if it works…

IMG_4737

Poached Pesto Eggs

POACHED PESTO EGGS

INGREDIENTS

  • 8 eggs
  • 1/3 cup plain goat cheese
  • 1 tblspn butter
  • 1 tblspn prepared pesto, plus extra for garnish
  • 4 slices brown bread
  • baby lettuce leaves
  • white vinegar

DIRECTIONS

In a small bowl mash the goat cheese, butter and pesto into a well combined, smooth paste. Do not be tempted to add more pesto as it will kill the taste of the cheese.
Toast the bread. Spread the cheese mixture on the toasts. Layer a few baby greens over the cheese. Bring a deep pot of water to a rolling boil. Add a few splashes of white vinegar and poach the eggs for 2 – 4 minutes.
Layer 2 eggs onto each slice of toast and add a dot of pesto onto each egg. Serves 4.

Stay safe. Stay sane, but most importantly – stay at home!


Advertisement

My favorite quarantine recipes Part VII

IMG_4652

Banana Bread

Week 7? That’s it? I’m just getting started over here! Say hello to a bunch of keeper recipes making their 2020 reprises. Here’s how this works: if we both like a new dish, it gets labeled a “keeper”. But if we find it a bit “meh”, we never mention it again.


SUNDAY

There are 2 fundamental issues with turkey meatloaf: it’s either too dry or too dry. This recipe uses rolled oats (yes, you read that correctly) which helps keep it moist and fluffy, and I took the liberty of doubling the tomato glaze ingredients, and so as God is your witness, you’ll never have to endure a dry loaf again.

IMG_4635

Turkey Meatloaf

TURKEY MEATLOAF

INGREDIENTS

For the Meatloaf:

  • 3 tablespoons unsalted butter
  • Pinch baking soda
  • ½ onion, chopped fine
  • Salt and pepper
  • 1 garlic clove, minced
  • 1 teaspoon minced fresh thyme
  • 2 tablespoons Worcestershire sauce
  • 3 tablespoons quick oats
  • 2 teaspoons cornstarch
  • 2 large egg yolks
  • 2 tablespoons Dijon mustard
  • 2 pounds 85 or 93 percent lean ground turkey
  • 1 ounce Parmesan cheese, grated (1/2 cup)
  • ⅓ cup chopped fresh parsley

For the glaze:

  • 2 cups ketchup
  • 1/2 cup packed brown sugar
  • 2 tblspn cider vinegar
  • 1 teaspoon hot sauce

DIRECTIONS

Do not use 99 percent lean ground turkey in this recipe; it will make a dry meatloaf. Three tablespoons of rolled oats, chopped fine, can be substituted for the quick oats; do not use steel-cut oats.

Adjust oven rack to upper-middle position and heat oven to 350 degrees. Line wire rack with aluminum foil and set in rimmed baking sheet. Melt butter in 10-inch skillet over low heat. Stir baking soda into melted butter. Add onion and 1/4 teaspoon salt, increase heat to medium, and cook, stirring frequently, until onion is softened and beginning to brown, 3 to 4 minutes. Add garlic and thyme and cook until fragrant, about 1 minute. Stir in Worcestershire and continue to cook until slightly reduced, about 1 minute longer. Transfer onion mixture to large bowl and set aside. Combine oats, cornstarch, 3/4 teaspoon salt, and 1/2 teaspoon pepper in second bowl.

Whisk all the glaze ingredients in saucepan until sugar dissolves. Bring mixture to simmer over medium heat and cook until slightly thickened, about 5 minutes; set aside.

Stir egg yolks and mustard into cooled onion mixture until well combined. Add turkey, Parmesan, parsley, and oat mixture; using your hands, mix until well combined. Transfer turkey mixture to center of prepared rack. Using your wet hands, shape into 9 by 5-inch loaf. Using pastry brush, spread half of glaze evenly over top and sides of meatloaf. Bake meatloaf for 40 minutes.

Brush remaining glaze onto top and sides of meatloaf and continue to bake until meatloaf registers 160 degrees, 35 to 40 minutes longer. Let meatloaf cool for 20 minutes before slicing and serving. Serves 6.


MONDAY

If you asked anyone what their favorite Peruvian dish was, they’d either say Ceviche or Lomo Saltado. Actually, to be fair, there are several dozen famous Peruvian specialties, but Lomo Saltado is without question the most popular standout. And this version (which is my own concoction) consists a stir fry of tender Beef filet chunks amid a drop-dead delectably dark and rich saucy sauce. I prefer my crispy French fries on top rather than mixing them in and getting them all soggy, but that’s up to the eater. Oh, and in case you’re wondering – the crema is literally the cream on top!

IMG_4640

Lomo Saltado

LOMO SALTADO

INGREDIENTS

For the Marinade:

  • 1 1/2 tsps cumin
  • 2 tsps ground black pepper
  • 1/2 cup beef au jus, or hearty beef stock
  • 2 tblspn rice vinegar
  • 3 tblspn sodium-reduced soy sauce
  • 2 tblspn oyster sauce
  • For the Stir-Fry:
  • 1 – 2 tblspn canola oil
  • 1 1/2lb beef tenderloin steak, cut into bite-sized chunks.
  • 1 red onion, cut into strips lengthwise
  • 1 cup cherry tomatoes, halved, or 1 15oz can diced tomatoes, drained
  • salt & pepper, to taste
  • 1 – 2 jalapeno peppers, cut into thin strips
  • 1/2 red bell pepper cut into strips
  • 1/2 yellow bell pepper cut into strips
  • 1/4 cup fresh cilantro, chopped
  • 2 scallions, thinly sliced
  • French fries

For the Crema:

  • 3 tblspn mayonaise
  • 2 tsps lemon juice
  • 2 tsps Chili paste (such as Shriracha)

DIRECTIONS

Season the steak with salt and pepper.
Whisk together the marinade ingredients in a small bowl. Set aside.
Blend the crema ingredients together until smooth. Refrigerate while cooking the rest of the meal.
Pour a small amount of oil in a wok & turn on medium heat. Once the oil is hot add the steak & cook until brown. Set aside. Add the onions to the hot oil and cook for 3 minutes. Add the tomatoes, jalapeño, peppers, cilantro, & marinade to the wok, slowly stirring until well blended. Simmer for 4 more minutes. Add back the steak and toss to heat through.
Serve in a large platter, top with hot french fries and scallions, and a drizzle of the topping sauce. Serves 4.


TUESDAY

The 2 reasons why so few people dare to make Pad Thai at home is because it all happens faster than the Kentucky Derby which requires flawless preparation, and you need a bunch of fairly specific ingredients. Thanks to the good people at America’s Test Kitchen who have come up with a recipe that not only works well and tastes amazing, but the only tricky-to-find ingredient on the list is Tamarind juice concentrate.

IMG_4644

Pad Thai

PAD THAI

INGREDIENTS

For the chile vinegar:

  • ⅓ cup distilled white vinegar
  • 1 serrano chile, stemmed and sliced into thin rings

For the Stir-Fry:

  • Salt
  • Sugar
  • 2 radishes, trimmed and cut into matchsticks
  • 8oz rice noodles
  • 3 tablespoons plus 2 teaspoons vegetable oil, separated
  • ¼ cup fish sauce
  • 3 tablespoons tamarind juice concentrate
  • 1 pound large shrimp peeled and deveined with tails attached
  • 4 scallions, white and light green parts minced, dark green parts cut into 1-inch lengths
  • 1 garlic clove, minced
  • 4 large eggs, beaten
  • 4 ounces (2 cups) bean sprouts
  • ¼ cup roasted unsalted peanuts, chopped coarse
  • Lime wedges

DIRECTIONS

Combine vinegar and chile in bowl and let stand at room temperature for at least 15 minutes.

Combine 1/4 cup water, 1/2 teaspoon salt, and 1/4 teaspoon sugar in small bowl. Microwave until steaming, about 30 seconds. Add radishes and let stand for 15 minutes. Drain and pat dry with paper towels.

Bring 6 cups water to boil. Place noodles in large bowl. Pour boiling water over noodles. Stir, then let soak until noodles are tender, about 10 minutes, stirring once halfway through soaking. Drain noodles and soak in cold water. Drain noodles well, then toss with 2 teaspoons oil.

Combine fish sauce, tamarind concentrate, and 3 tablespoons sugar in bowl and whisk until sugar is dissolved. Set sauce aside.

Remove tails from 4 shrimp. Cut shrimp in half lengthwise, then cut each half into 1/2-inch pieces. Toss shrimp pieces with 1/8 teaspoon salt and 1/8 teaspoon sugar. Arrange pieces in single layer on large plate and microwave at 50 percent power until shrimp are dried and have reduced in size by half, 4 to 5 minutes. (Check halfway through microwaving and separate any pieces that may have stuck together.)

Heat 2 teaspoons oil in 12-inch nonstick skillet over medium heat until shimmering. Add dried shrimp and cook, stirring frequently, until golden brown and crispy, 3 to 5 minutes. Transfer to large bowl.

Heat 1 teaspoon oil in now-empty skillet over medium heat until shimmering. Add minced scallions and garlic and cook, stirring constantly, until garlic is golden brown, about 1 minute. Transfer to bowl with dried shrimp.

Heat 2 teaspoons oil in now-empty skillet over high heat until just smoking. Add remaining whole shrimp and spread into even layer. Cook, without stirring, until shrimp turn opaque and brown around edges, 2 to 3 minutes, flipping halfway through cooking. Push shrimp to sides of skillet. Add 2 teaspoons oil to center, then add eggs to center. Using rubber spatula, stir eggs gently and cook until set but still wet. Stir eggs into shrimp and continue to cook, breaking up large pieces of egg, until eggs are fully cooked, 30 to 60 seconds longer. Transfer shrimp-egg mixture to bowl with scallion-garlic mixture and dried shrimp.

Heat remaining 2 teaspoons oil in now-empty skillet over high heat until just smoking. Add noodles and sauce and toss with tongs to coat. Cook, stirring and tossing often, until noodles are tender and have absorbed sauce, 2 to 4 minutes. Transfer noodles to bowl with shrimp mixture. Add 2 teaspoons chile vinegar, drained radishes, scallion greens, and bean sprouts and toss to combine.

Transfer to platter and sprinkle with peanuts. Serve immediately, passing lime wedges and remaining chile vinegar separately. Serves 2 – 3.


WEDNESDAY

There are a few locations in Manhattan where street food vendors have been shoveling chicken shawarma into tin-foil plates for hordes of midtown tie-wearers – who will gladly stand in line for most of their lunch breaks. I’m often tempted to join the line when I catch a whiff of the most drool-inducing middle-eastern flavors, but in the back of my mind I can’t get over the fact that it’s still…well…street meat. Below is literally the same recipe but made in safety of your own kitchen. (And you’ll notice that New York City pigeon poop and taxi cab exhaust are not on the ingredients list!)

IMG_4649

Chicken Shawarma

CHICKEN SHAWARMA

INGREDIENTS

  • 2 lemons, juiced
  • ½ cup plus 1 tablespoon olive oil
  • 6 cloves garlic, peeled, smashed and minced
  • 1 teaspoon kosher salt
  • 2 teaspoons freshly ground black pepper
  • 2 teaspoons ground cumin
  • 2 teaspoons paprika
  • ½ teaspoon turmeric
  • A pinch ground cinnamon
  • Red-pepper flakes, to taste
  • 2 pounds boneless, skinless chicken breasts sliced into bite sized pieces.
  • 1 large red onion, peeled and quartered
  • 2 tablespoons chopped fresh parsley
  • To serve (all optional):
  • Pita bread
  • Tahina sauce
  • Hot Sauce
  • Olives
  • Chopped tomatoes and cucumbers
  • Feta

DIRECTIONS

1. Prepare a marinade for the chicken. Combine the lemon juice, 1/2 cup olive oil, garlic, salt, pepper, cumin, paprika, turmeric, cinnamon and red-pepper flakes in a large bowl, then whisk to combine. Add the chicken, and toss well to coat. Cover, and store in refrigerator for at least 1 hour and up to 12 hours.

2. When ready to cook, preheat oven to 425. Use the remaining tablespoon of olive oil to grease a rimmed sheet pan. (Line with tin foil if desired). Add the quartered onion to the chicken and marinade, and toss once to combine. Remove the chicken from the marinade (leaving the onion behind), and place on the pan, spreading everything evenly across it.

3. Put the chicken in the oven, and roast for 10 minutes. Remove any liquid that might have been released. Add the onions and roast for another 10 – 15 minutes until the chicken is browned, crisp at the edges and cooked through. Remove from the oven, allow to rest 2 minutes.
Scatter the parsley and remaining olive oil over the top and serve with tomatoes, cucumbers, pita, white sauce, hot sauce, olives, fried eggplant, feta, rice — really anything you desire. Serves 4.


THURSDAY

Remember last week’s 10-hour Marinara sauce? Well, I’m still summoning the left-overs for double duty – and in this case they became the most amazing tomato base for our home-made pizzas. (This was supposed to be veggie night, but something happened.)

IMG_4655

Home-made Pizza’s

HOME-MADE PIZZA’S

INGREDIENTS

  • 3 cups (16 1/2 ounces) bread flour, plus more for work surface (see note)
  • 2 tablespoons sugar
  • 1/2 teaspoon instant or rapid-rise yeast
  • 1 1/3 cups ice water (about 10 1/2 ounces) (see note)
  • 1 tablespoon vegetable oil, plus more for work surface
  • 1 1/2 teaspoons table salt
  • 1 ounce finely grated Parmesan cheese (about 1/2 cup)
  • 8 ounces whole milk mozzarella, shredded (about 2 cups)
  • Any other toppings

DIRECTIONS

In food processor fitted with metal blade, process flour, sugar, and yeast until combined, about 2 seconds. With machine running, slowly add water through feed tube; process until dough is just combined and no dry flour remains, about 10 seconds. Let dough stand 10 minutes.

Add oil and salt to dough and process until dough forms satiny, sticky ball that clears sides of workbowl, 30 to 60 seconds. Remove dough from bowl and knead briefly on lightly oiled countertop until smooth, about 1 minute. Shape dough into tight ball and place in large, lightly oiled bowl. Cover tightly with plastic wrap and refrigerate for at least 24 hours and up to 3 days.

One hour before baking pizza, adjust oven rack to second highest position (rack should be about 4 to 5 inches below broiler), set pizza stone on rack, and heat oven to 500 degrees. Remove dough from refrigerator and divide into 3 equal balls. Shape each into a smooth, tight ball. Place on lightly oiled baking sheet, spacing them at least 3 inches apart; cover loosely with plastic wrap coated with nonstick cooking spray; let stand for 1 hour.

Only use 1 tablespoon flour directly onto the peel. Discard any extra flour. Holding with the palm of your hand, grab the edges and pull outwards in a circle until the dough covers the peel’s surface. Using back of spoon or ladle, spread 1/2 cup tomato sauce in thin layer over surface of dough, leaving 1/4-inch border around edge. Sprinkle 1/4 cup Parmesan evenly over sauce, followed by 1 cup mozzarella. Slide pizza carefully onto stone and bake until crust is well browned and cheese is bubbly and beginning to brown, 10 to 12 minutes, rotating pizza halfway through. Remove pizza and place on wire rack for 5 minutes before slicing and serving. Repeat step 5 to shape, top, and bake second pizza. Serves 3 – 4.


FRIDAY

I dare you to try and hold a conversation while eating these ridiculously tasty, crunchy, fragrant and ever so irresistible beef tacos.

IMG_4662

Tacos Dorados (Crispy Tacos)

TACOS DORADOS

INGREDIENTS

  • 1 tblspn water
  • ¼ tsp baking soda
  • 12oz 90 percent lean ground beef
  • 7 tblspn vegetable oil
  • 1 onion, chopped fine
  • 1 ½ tblspn chili powder
  • 1 ½ tblspn paprika
  • 1 ½ tblspn ground cumin
  • 1 ½ tsp garlic powder
  • Salt
  • 2 tblspn tomato paste
  • 2oz cheddar cheese, shredded (1/2 cup), plus extra for serving
  • 12 (6-inch) corn tortillas
  • Shredded iceberg lettuce
  • Chopped tomato
  • Sour cream
  • Pickled jalapeño slices
  • Hot sauce

DIRECTIONS

Adjust oven rack to middle position and heat oven to 400 degrees. Combine water and baking soda in large bowl. Add beef and mix until thoroughly combined. Set aside.

Heat 1 tablespoon oil in 12-inch nonstick skillet over medium heat until shimmering. Add onion and cook, stirring occasionally, until softened, 4 to 6 minutes. Add chili powder, paprika, cumin, garlic powder, and 1 teaspoon salt and cook, stirring frequently, until fragrant, about 1 minute. Stir in tomato paste and cook until paste is rust-colored, 1 to 2 minutes. Add beef mixture and cook, using wooden spoon to break meat into pieces no larger than ¼ inch, until beef is no longer pink, 5 to 7 minutes. Transfer beef mixture to bowl; stir in cheddar until cheese has melted and mixture is homogeneous. Wipe skillet clean with paper towels.

Thoroughly brush both sides of tortillas with 2 tablespoons oil. Arrange tortillas, overlapping, on rimmed baking sheet in 2 rows (6 tortillas each). Bake until tortillas are warm and pliable, about 5 minutes. Remove tortillas from oven and reduce oven temperature to 200 degrees.

Place 2 tablespoons filling on 1 side of 1 tortilla. Fold and press to close tortilla (edges will be open, but tortilla will remain folded). Repeat with remaining tortillas and remaining filling. (At this point, filled tortillas can be covered and refrigerated for up to 12 hours.)

Set wire rack in second rimmed baking sheet and line rack with double layer of paper towels. Heat remaining ¼ cup oil in now-empty skillet over medium-high heat until shimmering. Arrange 6 tacos in skillet with open sides facing away from you. Cook, adjusting heat so oil actively sizzles and bubbles appear around edges of tacos, until tacos are crispy and deeply browned on 1 side, 2 to 3 minutes. Using tongs and thin spatula, carefully flip tacos. Cook until deeply browned on second side, 2 to 3 minutes, adjusting heat as necessary.

Remove skillet from heat and transfer tacos to prepared wire rack. Blot tops of tacos with double layer of paper towels. Place sheet with fried tacos in oven to keep warm. Return skillet to medium-high heat and cook remaining tacos. Serve tacos immediately, passing extra cheddar, lettuce, tomato, sour cream, jalapeños, and hot sauce separately.


SATURDAY

There’s absolutely nothing exotic about shrimp toast, other than the way they taste. Here is a super easy, fool proof appetizer or cocktail party snack that will cause a sensation. And forget the gooey, sticky dipping sauce. These tasty triangles are just perfect as they are.

IMG_4670

Shrimp Toast

SHRIMP TOAST

INGREDIENTS

  • 6 scallions, chopped
  • 1 tablespoon chopped fresh mint
  • 1 garlic clove, chopped
  • 1 teaspoon freshly ground pepper
  • 1 teaspoon ground coriander
  • 1/2 teaspoon salt
  • 2 pounds medium shrimp-shelled, deveined and coarsely chopped
  • 2 large eggs
  • 1 teaspoon Asian sesame oil
  • 1 teaspoon Asian chili-garlic sauce
  • Unsalted butter, for greasing the baking sheet
  • 20 slices firm white sandwich bread
  • Vegetable oil, for brushing

DIRECTIONS

Preheat the oven to 425°. In a food processor, combine the scallions, mint, garlic, pepper, coriander and salt; pulse to mix. Add the shrimp and process to a thick paste. Add the eggs, sesame oil and chili-garlic sauce and process for 30 seconds. Transfer shrimp paste to a bowl.

Lightly butter 2 large baking sheets. Stack the bread slices and cut them into 3-inch squares, cutting off the crusts. Spread the bread with the shrimp paste and brush lightly with vegetable oil. Cut each square diagonally in half and arrange on the prepared baking sheets. Bake the shrimp toast in the middle and upper third of the oven for about 10 minutes, until the topping is cooked through; switch the pans halfway through baking.
Turn on the broiler. Working with one sheet at a time, broil the shrimp toasts 6 inches from the heat for about 2 – 4 minutes, until lightly browned and puffed. Transfer the toasts to a platter and serve immediately.


BONUS RECIPE

Ok, so while I might be the very last person in lockdown to bake banana bread (since when did it become a COVID-prevention?), I doubt if anyone else took the trouble to save a few slices to pop into the waffle iron before smothering them with caramelized bananas for an amped-up breakfast. I didn’t think so.

IMG_4672

Banana Bread Waffles with Caramelized Bananas

BANANA BREAD

INGREDIENTS

This is a great way to use overripe bananas. But if you have fresh bananas, let them spend a day or two in the freezer which will soften them up nicely once they thaw out.

  • 1 1/2 cups flour
  • 1 1/2 tspn baking powder
  • 1/4 tspn baking soda
  • 1/8 tspn salt
  • 1/4 tspn cinnamon
  • 1 egg
  • 1 cup mashed bananas (about 3)
  • 3/4 cup sugar
  • 1/4 cup cooking oil
  • 1 tspn grated lemon rind
  • 1/2 cup roughly chopped walnuts (optional)

DIRECTIONS

Grease the bottom and 1/2 inch up the sides of a 9X3 inch loaf pan. Set aside.
In a medium mixing bowl combine flour, baking powder, baking soda, cinnamon and salt.
In another bowl combine the egg, bananas, sugar, oil and lemon rind.
Add the dry mixture to the egg mixture. Stir until moistened.
Spoon batter into the prepared pan. Bake in 350 degree oven for 60 – 70 minutes until toothpick inserted into the center comes out clean and the corners are slightly burned.
Cool on a wire rack for 10 minutes. Remove loaf and continue to cool on the rack. Wrap and store overnight before slicing. Serves 8.


CARAMELIZED BANANAS

INGREDIENTS

  • 2 ripe bananas
  • 1 tbsp coconut oil
  • 2 tbsp honey
  • 1/2 tsp ground cinnamon
  • 1/8 tsp salt

DIRECTIONS

Remove the peels from the bananas and slice them into 1/2″ inch thick discs.

Set a nonstick skillet over medium heat and add the oil or butter, honey, cinnamon, and salt. Stir to combine.

Add the banana slices, and fry for 2-3 minutes on each side, until golden and caramelized. Be sure to watch the heat and turn it down if it browns too quickly. You want enough heat to caramelize and brown the slices, but you don’t want them to burn. Serve on ice- cream, oatmeal or waffles. Serves 2.


Stay safe. Stay sane, but most importantly – stay inside!


My favorite quarantine recipes Part VI

IMG_4563

Oat Bar “Crunchies”

It’s been 6 weeks and I’ve really started shaking out my recipe books to loosen some of our most beloved – but (of late) ignored mealtime favorites that haven’t seen the light of the stove for many years. They’re tried, they’re true and they’re simply terrific. See what you think.


Sunday

We’ve been bumping into quite a bounty of wild caught salmon lately, and one of the simplest-yet tastiest ways to really enjoy a firm and juicy sockeye steak is to poach it on top of a few supporting vegetables in a fragrant broth, and then smother it with the most luxuriously smooth, silky, salty, creamy, dreamy dressing known to man.

IMG_4597

Poached Salmon with Green Goddess Dressing

POACHED SALMON

INGREDIENTS

  • 1 small onion, sliced
  • 1 medium carrot, chopped
  • 1 stalk celery, chopped
  • 6 whole black peppercorns
  • 2 bay leaves
  • 1/2 cup dry white wine (or fish stock)
  • 4 salmon fillets (6 ounces each)
  • Coarse salt and freshly ground pepper

DIRECTIONS

In a medium skillet (with a lid), combine the onion, carrot, celery, peppercorns, bay leaves, and wine. Add enough water to come 1 1/2 inches up side of skillet. Bring to a boil; reduce heat, and simmer 15 minutes.

Season salmon fillets with salt and pepper, and place in skillet. Cover; simmer 5 minutes. Remove from heat, let stand until fillets are opaque, 8 to 10 minutes. Serve warm or chilled with green goddess dressing.

GREEN GODDESS DRESSING

INGREDIENTS

  • 1/2 cup mayonnaise
  • 1 1/2 Tblspn fresh flat-leaf parsley (chopped)
  • 1 1/2 Tblspn chopped chives
  • 1 Tblspn chopped chervil
  • 1/2Tblspn chopped scallion
  • 1 Tblspn chopped tarragon
  • 1/2 Tblspn white-wine vinegar
  • Coarse salt and freshly ground pepper
  • 1 anchovy fillets
  • 1 Tblspn whole milk

DIRECTIONS

Soak anchovies in milk for 15 minutes. Drain and discard the milk. Rinse anchovies.
In a food processor, combine all of the remaining ingredients. Process until smooth and creamy.  Season with salt and pepper. Serves 4.


Monday

Just because it’s veggie night doesn’t mean we have to slam on the flavor brakes. In fact, this spicy, garlicky Chermoula dressing elevates these grilled eggplants all the way to the penthouse before being topped with a bulgur salad spiked with nuts, olives and a few other surprises.

IMG_4599

Chermoula Eggplant with Bulgur Salad

CHERMOULA EGGPLANT WITH BULGUR SALAD

INGREDIENTS

  • 2 cloves garlic, crushed
  • 2 teaspoons ground cumin
  • 2 teaspoons ground coriander
  • 1 teaspoon chili flakes
  • 1 teaspoon sweet paprika
  • 2 tablespoons lemon zest
  • ⅔ cup olive oil, plus extra to finish
  • 2 medium eggplants
  • 1 cup fine bulgur
  • 1 cup boiling water
  • ⅓ cup golden raisins
  • 3 ½ tablespoons warm water
  • ⅓ ounce (2 teaspoons) cilantro, chopped, plus extra to finish
  • ⅓ ounce (2 teaspoons) mint, chopped
  • ⅓ cup pitted green olives, halved
  • ⅓ cup sliced almonds, toasted
  • 3 green onions, chopped
  • 1 ½ tablespoons freshly squeezed lemon juice
  • ½ cup Greek yogurt
  • Salt

DIRECTIONS

Preheat oven to 400 degrees.

To make the chermoula, mix together in a small bowl the garlic, cumin, coriander, chili, paprika, lemon zest, two-thirds of the olive oil, and 1/2 teaspoon salt.

Cut the eggplants in half lengthwise. Score the flesh of each half with deep, diagonal crisscross cuts, making sure not to pierce the skin. Spoon the chermoula over each half, spreading it evenly, and place the eggplant halves on a baking sheet, cut side up. Put in the oven and roast for 45 minutes, or until the eggplants are completely soft.

Meanwhile, place the bulgur in a large bowl and cover with the boiling water. Cover the bowl with a plate and leave for 20 minutes until the bulgur is chewy-soft.

Soak the raisins in the warm water. After 10 minutes, drain the raisins and add them to the bulgur, along with the remaining oil. Add the herbs, olives, almonds, green onions, lemon juice and a pinch of salt and stir to combine. Taste and add more salt if necessary.

Serve the eggplants warm or at room temperature. Place 1/2 eggplant, cut side up, on each individual plate. Spoon the bulgur on top, allowing some to fall from both sides. Spoon over some yogurt, sprinkle with cilantro and finish with a drizzle of oil. Serves 4.


Tuesday

Chimichurri is to steak, what fried turkey legs are to NASCAR! You just can’t enjoy the one without the other. Oh, and if there is any left over, it provides a monstrously wonderful dip for a spare piece of baguette (or six)!

IMG_4617

Skirt Steak with Chimichurri sauce and sweet-potato fries

CHIMICHURRI SAUCE

INGREDIENTS

  • 1/3 cup olive oil
  • Kosher salt, freshly ground pepper
  • 1/2 cup fresh cilantro leaves with tender stems
  • 1/2 cup fresh flat-leaf parsley leaves
  • 1/4 cup fresh oregano leaves
  • 1 tablespoon fresh thyme leaves
  • 1 tsp red pepper flakes
  • 1 garlic clove
  • 2 tablespoons red wine vinegar

DIRECTIONS

Pulse cilantro, parsley, oregano, thyme, and garlic in a food processor until finely chopped. With motor running, slowly add vinegar and oil and process until combined; season with salt and pepper. Add red pepper flakes to taste. If making far ahead, reduce garlic by 1/2.


Wednesday

One of the HBO show’s we’ve been binge-watching during lockdown is “My brilliant friend”. And at one point two of the main characters are seated around a table in the middle of a huge argument, while the most delectable Spaghetti Marinara is being served. It provoked the most mouth-wateringly dish-envy ever, and so I was inspired to slow-cook one of the simplest Italian sauces for 10 hours. I’m talking about the most fragrant, sumptuous and decadent tomato gravy you’ve ever tasted. Warning: this recipe yields a ton of sauce, so feel free to re-invent it on pizza’s, spread thinly onto fresh focaccia or use it as a base for baked eggs. (See Saturday’s recipe).

IMG_4607

Spaghetti with 10-hour Classic Marinara Sauce

CLASSIC 10-HOUR MARINARA SAUCE

INGREDIENTS

  • 2 onions, chopped fine
  • 6 garlic cloves, minced
  • 2 tablespoons tomato paste
  • 2 tablespoons extra-virgin olive oil
  • 2 tablespoons minced fresh oregano or 2 teaspoons dried
  • Salt and pepper
  • 2 (28-ounce) cans crushed tomatoes
  • 1 (28-ounce) can tomato puree
  • ½ cup dry red wine
  • 2 teaspoons sugar, plus extra for seasoning
  • chopped fresh basil

DIRECTIONS

Microwave onions, garlic, tomato paste, oil, oregano, and 1 teaspoon salt in bowl, stirring occasionally, until onions are softened, about 5 minutes; transfer to slow cooker. Stir in tomatoes, tomato puree, and wine. Cover and cook until sauce is deeply flavored, 8 to 10 hours on low or 5 to 7 hours on high.

Stir sugar into sauce. Season with salt, pepper, and extra sugar to taste. Before serving, stir in 2 tablespoons basil. Makes 6 cups of sauce.


Thursday

This is one of my oldest recipes. Not just because I’ve been making it for 20+ years, but because old man Chasen became famous for it in his legendary Beverly Hills hotspot, and by the time Elizabeth Taylor was in production for “Cleopatra” in 1963, a quart of this very chili had to shipped to her on location in Egypt once a week per her contract with the studio. Yes people, it’s that good! Oh, and these buttermilk biscuits are as flaky as croissants.

IMG_4614

Chasen’s Chili with Super-flaky Buttermilk Biscuits

CHASEN’S CHILI

INGREDIENTS

  • 1/2 pound dried pinto beans
  • 1 (28-ounce) can diced tomatoes in juice
  • 1 large green bell pepper, chopped
  • 2 tablespoons vegetable oil
  • 3 cups onions, coarsely chopped
  • 3 cloves garlic, crushed
  • 1/2 cup parsley, chopped
  • 1/2 cup butter (separated)
  • 2 pounds beef chuck, coarsely chopped
  • 1 pound pork shoulder, coarsely chopped
  • 1/3 cup Gebhardt’s brand chili powder
  • 1 tablespoon salt
  • 1 1/2 teaspoons black pepper
  • 1 1/2 teaspoons ground cumin
  • 1 small tin tomato sauce (if needed)

DIRECTIONS

Rinse the beans, picking out the debris. Place beans in a Dutch oven with water to cover. Boil for 2 minutes. Remove from heat. Cover and let stand one hour. Drain off liquid.
Rinse beans again. Add enough fresh water to cover beans. Bring mixture to a boil. Reduce heat and simmer, covered for one hour or until tender. Set aside.
Melt 2/3 of the butter in a large Dutch oven or Slow cooker. Brown the meat thoroughly for about 10 minutes. Remove the meat with a slotted spoon and pour into a strainer over a bowl to remove all the liquids.
Melt the remaining 1/3 of the butter in the same pot. Sautee bell pepper for 5 minutes. Add onion and cook until tender, stirring frequently. Stir in the garlic and parsley. Add tomatoes and their liquid along with the chili powder, salt, pepper, and cumin. (If there isn’t enough liquid, add a small tin of tomato sauce.)
Bring mixture to a boil. Add the meat. Reduce heat. Simmer, covered for one hour. Uncover and add the beans and cook 30 minutes more or to desired consistency. Chili shouldn’t be too thick–it should be somewhat liquid but not runny like soup. Makes 8 cups.

SUPER-FLAKY BUTTERMILK BISCUITS

INGREDIENTS

  • 3 cups all-purpose flour
  • 2 tablespoons sugar
  • 4 teaspoons baking powder
  • ½ teaspoon baking soda
  • 1 ½ teaspoons salt
  • 16 tablespoons (2 sticks) unsalted butter, frozen for 30 minutes
  • 1 ¼ cups buttermilk, chilled

DIRECTIONS

In hot or humid environments, chill the flour mixture, grater, and work bowls before use. The dough will start out very crumbly and dry in pockets but will be smooth by the end of the folding process; do not be tempted to add extra buttermilk. Flour the counter and the top of the dough as needed to prevent sticking, but be careful not to incorporate large pockets of flour into the dough when folding.

Line rimmed baking sheet with parchment paper and set aside. Whisk flour, sugar, baking powder, baking soda, and salt together in large bowl. Coat sticks of butter in flour mixture, then grate 7 tablespoons from each stick on large holes of box grater directly into flour mixture. Toss gently to combine. Set aside remaining 2 tablespoons butter.

Add buttermilk to flour mixture and fold with spatula until just combined (dough will look dry). Transfer dough to liberally floured counter. Dust surface of dough with flour; using your floured hands, press dough into rough 7-inch square.

Roll dough into 12 by 9-inch rectangle with short side parallel to edge of counter. Starting at bottom of dough, fold into thirds like business letter, using bench scraper or metal spatula to release dough from counter. Press top of dough firmly to seal folds. Turn dough 90 degrees clockwise. Repeat rolling into 12 by 9-inch rectangle, folding into thirds, and turning clockwise 4 more times, for total of 5 sets of folds. After last set of folds, roll dough into 8 1/2-inch square about 1 inch thick. Transfer dough to prepared sheet, cover with plastic wrap, and refrigerate for 30 minutes. Adjust oven rack to upper-middle position and heat oven to 400 degrees.

Transfer dough to lightly floured cutting board. Using sharp, floured chef’s knife, trim 1/4 inch of dough from each side of square and discard. Cut remaining dough into 9 squares, flouring knife after each cut. Arrange biscuits at least 1 inch apart on sheet. Melt reserved butter; brush tops of biscuits with melted butter.

Bake until tops are golden brown, 22 to 25 minutes, rotating sheet halfway through baking. Transfer biscuits to wire rack and let cool for 15 minutes before serving.


Friday

Another old favorite – that never gets old. ‘nuff said!

IMG_4623

Sole Meuniére with Brown butter Caper sauce

SOLE MEUNIERE WITH BROWN BUTTER CAPER SAUCE

INGREDIENTS

  • 2 (8 ounces) sole fillets
  • Salt and freshly ground black pepper
  • 2 tablespoons clarified butter
  • 1/2 cup flour
  • 2 tablespoons finely chopped parsley
  • 2 tablespoons fresh butter
  • 1 tablespoons fresh lemon juice
  • 1 tablespoons drained brined capers, minced
  • Lemon slices, for garnish

DIRECTIONS

Season fillets with salt and pepper.

Heat 2 tablespoons clarified butter in each of 2 large saute pans.

Dredge fillets in flour, shaking off any excess flour. Place fillets in saute pans and cook over medium heat for 2 to 3 minutes per side, until golden brown and crispy. Remove fillets from pans and transfer on to a platter, sprinkle with parsley. Cover with foil.

Remove remaining butter from one of the skillets and add the fresh butter. Heat until the butter begins to brown. Remove from heat and stir in lemon juice and capers. Pour sauce over fish and serve. Garnish with lemon slices. Serves 2.


Saturday

OK, so about that left-over marinara from Wednesday: just load it in a cast-iron skillet. Make 4 indentations and carefully lower an egg into each indentation. Bake for 12-ish minutes at 400 degrees and then top each egg with grated parmesan and chopped basil and dig in with plenty of crusty bread.

IMG_4629

Italian Baked Eggs


Bonus recipe

This is an old classic from my youth. We used to call them “Crunchies”, but here in the US they would probably be referred to as “Oat Bars”. I don’t care what you call them, but they are the quintessential remedy for the 3pm munchies.

SOUTH AFRICAN CRUNCHIES

INGREDIENTS

  • 1/2lb butter
  • 1 tbspn golden syrup
  • 2 cups of rolled oats
  • 1 cup of flour
  • 1 cup shredded coconut
  • 1 cup brown sugar
  • 1 tsp baking soda

DIRECTIONS

Pre heat the oven to 350 degrees.
Mix the flour, oats and coconut in a bowl.
Melt the butter in a small pot and then add the syrup and sugar and continue to cook. When the butter is bubbling, add the baking soda and stir to combine and remove from the heat.
Pour the butter mixture into the dry ingredients and mix together by hand.
Using the back of a metal spoon, gently press the crunchie mixture into a greased or parchment-lined baking tray – size dependant on how thick you like the crunchies.
Bake for 15 minutes at 350 degrees, then turn the oven down to 325 degree and bake for a further 12 – 15 minutes until golden brown. (The thinner they are, the crunchier they will be. The thicker they are, the softer they will be and the longer they will need to bake.)
Allow to cool in the pan before slicing. Serves about 9.


Stay safe. Stay sane, but most importantly – stay inside!


My favorite quarantine recipes Part V

IMG_4587

Yogurt parfait with Granola

After 35 days of isolation, I’ve made 35 different dishes with not much abatement in sight. In fact, my “no recipe duplication challenge” has only just hit 2nd gear. Still so much to cook, eat (and clean up) until New York’s restaurant scene re-emerges.  Here are this past week’s sweet and savory delights.


SUNDAY

I cannot begin to describe the most amazing garlicky, gingery, chili aromas that emanate from the kitchen with this all-in-one roast chicken and potatoes, but the fact that it takes nearly 3 hours to do so makes for some very envious neighbors. A great meal for a Sunday night where you have the time to work up a furious appetite.

IMG_4542

Slow roasted chicken and potatoes

SLOW ROASTED CHICKEN AND POTATOES

INGREDIENTS

  • 1 3½–4-lb. whole chicken
  • 1¾ tsp kosher salt, plus more
  • Freshly ground black pepper
  • 5 Tbsp. gochujang (Korean hot pepper paste)
  • ¼ cup plus 2 Tbsp. extra-virgin olive oil
  • 3 heads of garlic
  • 1 ½” piece fresh ginger
  • 1½ lb. baby Yukon Gold potatoes (about 1½” in diameter)
  • 5 scallions
  • 2 limes
  • 2 tsp. honey

DIRECTIONS

Do Ahead: Chicken can be seasoned 12 hours ahead. Chill chicken if you’re not going to cook within 2 hours of seasoning.

Place a rack in middle of oven; preheat to 300°. Pat chicken dry with paper towels. Place on a small rimmed baking sheet. Season whole chicken all over with 1 Tbsp kosher salt and lots of freshly ground black pepper, making sure to season the inside cavity.

Whisk gochujang and 1/4 cup olive oil in a medium bowl until combined. Finely grate 3 garlic cloves (from one of the heads of garlic) into gochujang oil. Peel ginger and then grate into gochujang oil; whisk to combine.

Cut what’s left of the head of garlic in half crosswise. Repeat with the second and third heads as well. Stuff 2 garlic head halves (or individual close if they come apart) inside cavity of chicken. Tie legs together with kitchen twine.

Using a pastry brush, brush half of gochujang oil over chicken.

Toss potatoes and remaining garlic halves and 2 Tbsp. extra-virgin olive oil in remaining gochujang oil until well coated. Season lightly with salt and pepper and toss again to combine.

Arrange potatoes in a 12″ cast-iron skillet, scooting them toward edges of pan to make space for chicken. Nestle as many garlic halves (cut sides down) as needed in center of skillet. Stand the chicken on top of the garlic halves—as it roasts, it will infuse the fat (and thus, the potatoes) with flavor. If any potatoes have shimmied their way under the chicken, use tongs to arrange them around it (they won’t cook at the same rate if they’re underneath the chicken).

Roast chicken and potatoes, turning potatoes once or twice to coat in juices and oil that accumulate in pan, until potatoes are very tender when pressed with the back of a spoon, and chicken skin is deep reddish-golden brown in color, 2½–3 hours. When you wiggle the legs of the chicken, they should feel loose in the joints, meaning the meat is fall-apart tender. Transfer chicken to a cutting board and let rest 10–15 minutes.

Meanwhile, use the back of a large spoon or a potato masher to gently smash potatoes in skillet, exposing some of their flesh to juices underneath so they can soak them up.

Finish the potatoes: Thinly slice 5 scallions on a long diagonal. Cut 2 limes in half. Cut 1 half into wedges and set aside. Stir 2 tsp. honey and juice of remaining lime half into potatoes. Taste potatoes and season with more salt if needed. Scatter sliced scallions over potatoes.

Carve chicken, then arrange pieces over potatoes and scallions. Serve right out of skillet with remaining lime wedges alongside for squeezing, and squeeze out the sweet, slow-roasted garlic cloves as you wish. Serves 4-6.


MONDAY

It’s pretty hard to intimidate mussels. You can pretty much throw anything at them and they will thrive and survive. This dish has a one-two-punch from a pair of red-pepper sauces that crank the bivalves up 3 notches to a restaurant-quality dish with an impressive “wow” factor. (You’ll want to drink up the sauce when the mussels are gone.)

IMG_4546

Mussels with Harissa and Basil

MUSSELS WITH HARISSA AND BASIL

INGREDIENTS

  • 2 medium-size red bell peppers, halved
  • 1 medium-size white onion, unpeeled, quartered lengthwise
  • 2 1/2 tablespoons plus 1 teaspoon olive oil, divided
  • 2 medium garlic cloves, unpeeled
  • 1/4 cup chopped toasted walnuts
  • 1 small dried Thai chile, stem removed
  • 2 teaspoons fresh lemon juice
  • 1 teaspoon kosher salt
  • 3 – 4 pounds mussels, scrubbed and de-bearded
  • 1/2 cup dry white wine
  • 1/4 – 1/2 cup harissa (depending on spiciness)
  • 1 tablespoon unsalted butter
  • 1/2 cup roughly torn fresh Thai basil leaves
  • 1/2 cup Pickled Red Onion slices

DIRECTIONS

Preheat oven to broil with oven rack in middle of oven. Rub bell pepper halves and 2 onion quarters with 1 teaspoon olive oil. (Reserve remaining onion quarters for another use.) Arrange bell pepper halves and onion quarters, cut sides down, on a rimmed baking sheet. Broil in preheated oven until bell peppers are well charred, about 15 minutes, adding garlic to baking sheet halfway through broiling. Place bell peppers, onion, and garlic in a bowl, and cover with plastic wrap. Let stand at room temperature until vegetables are cool enough to handle and bell peppers are softened, about 10 minutes. Remove and discard garlic skins and charred skin from bell peppers and onion.

Transfer bell pepper mixture to a blender; add walnuts, Thai chile, lemon juice, salt, and remaining 2 1/2 tablespoons oil. Begin processing on low speed, and gradually increase speed to high, processing until smooth, about 45 seconds total. Set bell pepper puree aside.

Heat a large heavy-bottomed saucepan or Dutch oven over medium-high until very hot, about 3 minutes. Add mussels, and shake pan to arrange mussels in an even layer. Pour wine into pan, and cover with lid. Cook, shaking pan occasionally, until mussels begin to open, about 5 minutes. Stir in harissa and butter. Cover and cook, shaking pan occasionally, until mussels are completely open, about 2 minutes. Remove from heat, and discard any mussels that did not open. Stir in bell pepper puree. Using a slotted spoon, transfer mussels to deep bowls, and pour sauce from pan evenly over mussels. Sprinkle evenly with Thai basil leaves and pickled red onion petals. Serves 4.


TUESDAY

I opted to keep things super simple for vegetarian day with these spicy, caramelized roasted yams that enjoy a bright and refreshing lime-flavored yogurt dressing to bring home the sweet, sour, tang and tart in a single mouthful. (The leftovers are great – sliced up in salads).

IMG_4559

Roasted yams

ROASTED YAMS

INGREDIENTS

  • 3 large yams
  • 2 tablespoons honey
  • 1 tablespoon crushed red-pepper flakes
  • 3 tablespoons extra-virgin olive oil
  • Kosher salt and freshly ground black pepper
  • ½ cup Greek-style yogurt
  • 4 tablespoons fresh lime juice, approximately 2 limes
  • 2 scallions, both green and white parts, trimmed and thinly sliced, for garnish

DIRECTIONS

Heat oven to 425. Cut the yams lengthwise into 4 wedges per yam. Put them in a large bowl, and toss them with the honey, ½ tablespoon of the crushed red-pepper flakes and 2 tablespoons of the olive oil. Let it sit for 10 minutes or so, tossing once or twice to coat, as the oven heats.

Transfer the yams to a foil-lined, rimmed baking sheet, season with salt and pepper and then bake until they are deeply caramelized around the edges and soft when pierced with a fork at their thickest part, approximately 30 to 35 minutes.

As the yams roast, combine the yogurt, lime juice and remaining tablespoon of olive oil in a small bowl, and whisk to combine, then season with salt and pepper to taste. Set aside.

When the yams are done, transfer them to a serving platter, drizzle the yogurt over them and garnish with the remaining Espelette pepper or red-pepper flakes, the scallions and some flaky sea salt if you have any. Serves 4-6.


WEDNESDAY

Seeing as there was a little gochujang left from Sunday’s chicken, I wrested this quick-and-easy recipe from virtual obscurity which makes a lonely pork-chop, a legend in his own lunchtime.

IMG_4568

Korean grilled Pork Chops

KOREAN GRILLED PORK CHOPS

INGREDIENTS

  • 1/3 cup dry roasted peanuts
  • 3 tblspn canola oil (separated)
  • 1/2 tsp chili powder
  • 2 boneless pork chops, thin cut and trimmed
  • salt and freshly ground black pepper
  • 2 tblspn gochujang
  • 1 tblspn orange juice
  • 2 tsp mirin
  • 2 scallions thinly sliced

DIRECTIONS

Use 1 tblspn of the oil to fry up the peanuts until they are golden brown. Drain on paper towels and sprinkle with the chili powder and set aside.
Whisk the gochujang, juice and mirin together.
Salt and pepper both sides of the chops.
Broil or fry in a cast iron skillet until well browned (about 4 minutes). Flip over and cook the other side. Smother the chops into the sauce (or pour over them while still in the pan) until well coated on both sides. Sprinkle with the peanuts and scallions. Serves 2.


THURSDAY

Who would have predicted that the two scarcest commodities during the COVID-19 pandemic would turn out to be toilet-paper and yeast. I get the fact that we all have to poop, but since when did we all have to bake bread? I mean really! I’ve had the craving for a multi-layered-salami-and-cheese Muffuletta sandwich for some time now, but was determined to bake my own rosemary-lemon loaf. Who knew I would have to reach out to a shady character to score me a few grams of yeast from slightly north of the Mexico border?

IMG_4576

Muffuletta

MUFFULETTA

INGREDIENTS

For Olive Relish:

  • 1 (8-ounce) jar giardiniera (pickled vegetables), drained and rinsed
  • 1 cup mixed pitted marinated olives (5 ounces)
  • 1/2 cup jarred roasted bell peppers, drained
  • 1/2 cup loosely packed parsley leaves
  • 1 tablespoon capers
  • 2 garlic cloves, minced
  • 1/4 cup olive oil
  • 1 1/2 tablespoons red wine vinegar

For Muffuletta:

  • 1 (1-pound) muffuletta loaf or round ciabatta
  • 6 ounces provolone cheese slices
  • 6 ounces mozzarella cheese slices
  • 8 ounces thinly sliced ham
  • 8 ounces thinly sliced capicola
  • 8 ounces thinly sliced mortadella

DIRECTIONS

Combine giardiniera, olives, bell peppers, parsley, capers, and garlic in a food processor. Pulse until finely chopped. Place mixture in a bowl; stir in oil and vinegar. Let stand 1 hour; cover and chill up to 2 days.

Cut bread in half horizontally. Tear away some of the soft bread interior to make some room for the fillings. Spread half of olive relish over bottom half of bread; top with half of cheese, all of the meats, and then the remaining cheese. Spread remaining olive relish on top half of bread, and close the sandwich. Wrap entire sandwich tightly in plastic wrap, and weigh it down slightly. Refrigerate 1 to 2 hours. Cut into 8 wedges. Serves 4.


FRIDAY

Dumb question: Who doesn’t like fried chicken? But one of the many reasons I adore this 18 year-old recipe, is that even though the chicken cooks in the oven, the buttermilk and garlic brine is an iron-clad insurance policy that guarantees moist and tender breasts. You can pair this with any slaw, but I happen to love this red one.

IMG_4578

Oven fried Chicken

OVEN FRIED CHICKEN

INGREDIENTS

  • 4 boneless chicken breasts
  • 2 pints buttermilk
  • 8 cloves garlic, peeled and halved
  • 1 cup flour
  • 1/3 cup rustic Cajun rub (I prefer Emeril’s classic)
  • 1/2 cup vegetable oil

DIRECTIONS

Add the garlic, buttermilk and chicken to a zip lock bag and marinate in the refrigerator for at least 24 hours and up to 3 days.
Preheat the oven to 350 degrees.
Mix the Cajun spices with the flour in a bowl. Discard the garlic and buttermilk and dip each chicken breast into the flour mixture to thoroughly coat on all sides.
Heat the oil in a medium sized skillet on medium heat. Gently fry each breast for only 2 minutes on one aide. This step is purely for color. Using a spatula and tongs, very, very gently flip them over for another 2 minutes, taking care not to lose any of the fragile crust which is still very soft. Carefully transfer the breasts to a wire rack set over a baking sheet and bake in the oven for 25 – 35 minutes until they reach 165 degrees. Serves 4.

RED CABBAGE SLAW

INGREDIENTS

  • 1/2 cup apple cider vinegar
  • 2 tablespoons sugar
  • 1/4 cup extra-virgin olive oil
  • 2 teaspoons celery seed
  • Salt and freshly ground black pepper
  • 1/2 head red cabbage, cut into roughly 1 1/2-inch chunks
  • 2 small carrots, grated
  • 1 small red onion, chopped
  • 1 cup golden raisins

DIRECTIONS

In a large bowl, whisk together vinegar and sugar until dissolved. Slowly whisk in oil, celery seed, salt and pepper to taste. Toss in cabbage, carrots, red onion and raisins to coat well. Cover and let sit at least 1 hour. Serves 6.

SATURDAY

I dare you to throw away that old sweet and sour shrimp recipe you’ve been hanging onto all these years. It’s not as if it ever tasted remotely like the real thing anyway. This gem comes from a cooking class I attended in Hong Kong by a former Cantonese restaurateur who bragged that she had served over 500,000 of these during her career. (For a healthy alternative, substitute cauliflower rice for regular Jasmin).

IMG_4584

Sweet and Sour Shrimp

SWEET AND SOUR SHRIMP

INGREDIENTS

  • 1 Tbslpn cooking oil
  • 1/2 cup onion cut into strips
  • 1/3 cup pickled carrots
  • 2 Tblspn pickled ginger
  • 1/4 cup fresh ginger, julienned
  • 2 Tblspn garlic, thinly sliced
  • 1lb shelled and deveined shrimp
  • 1/2 red chilli pepper cut into strips
  • 1/2 green chilli pepper cut into strips
  • 1/2 cup rice vinegar
  • 3/4 cup sugar
  • 2 tsp HP sauce
  • 2 tsp Worcestershire sauce
  • 1/4 cup ketchup
  • 1/2 tspn salt
  • 1/4 cup water
  • 1 tsp potato starch
  • 4 spring onions cut into 1 1/2″ lengths on the bias
  • Sesame oil

DIRECTIONS

Stir the vinegar, sugar and the 3 sauces in a jug until well combined. Set aside.
Heat a wok over medium-high. Add the cooking oil and stir fry the onion, fresh ginger and garlic for 1 minute. Add the shrimp and toss for another 1 – 2 minutes.
Add the chilli peppers, pickled carrots and ginger. Keep tossing the ingredients. Add the sauce mixture and cook for about 3 – 5 minutes, stirring constantly.
In a small ramiken, dissolve the potato starch in the water and add to the wok to thicken. Remove from heat and add the spring onions and a dash of sesame oil. Toss once or twice more and serve immediately with rice. Serves 4.


BONUS RECIPE

Don’t you find that most Granola’s are nothing more than stale, brown crumbs and sawdust? After the endless additions I’ve made over the years, this one has become somewhat of a signature. But be warned, even though this insanely nutty Granola is intended for yogurt, fruit or ice-cream toppings, it is also a dangerously snackable snack. Keep out of reach of adults.

IMG_4588

Insanely nutty Granola

INSANELY NUTTY GRANOLA

INGREDIENTS

  • 3 cups rolled oats
  • 1 cup unsalted shelled pistachios
  • 1 cup unsweetened coconut flakes
  • ⅓ cup raw pumpkin seeds
  • 1/3 cup raw pecans
  • 1/3 cup raw sunflower seeds
  • 1/2 cup raw almonds
  • 1/2 cup roasted hazelnuts (chopped in half)
  • 2 tspn salt
  • ⅓ cup dark molasses
  • ⅓ cup coconut oil
  • ¾ cup dried sour cherries

DIRECTIONS

Preheat oven to 300. In a large bowl, mix together the oats, pistachios, coconut, pumpkin seeds, almonds, sunflower seeds, pecans, hazelnuts and salt.

In a small saucepan set over low heat, warm the oil and molasses until just combined, then remove from heat. Fold liquids into the oat and nut mixture, making sure to coat all the dry ingredients well.

Line a large rimmed baking sheet with parchment paper or a silicone baking mat, and spread the granola over it. Flatten and smoothe to an even layer. Bake until dry and lightly golden for about 30 minutes, stirring around halfway through.

Remove granola from oven, and allow to thoroughly cool. Mix in the dried sour cherries and transfer to a storage container. Makes 6 cups.


Stay safe. Stay sane, but most importantly – stay inside!

My favorite quarantine recipes Part IV

4th week into my self-inflicted, no-repeat recipe challenge, and still going strong with another round of newbies and a few tried and true-bies. Trying to balance my proteins with seasonal veggies or salads on the side. It’s all about color, variety and putting every single taste bud to work.

SUNDAY

I seldom volunteer to whip up a Risotto. It’s that I don’t like the dish (there’s nothing more sublime than a steaming hot, creamy, nutty, sticky, cheesy puddle of rice), but for those who have never stood at a stove for a solid hour, stirring relentlessly until your hands blister, here’s a dish that is packed with flavor, crunch and yumminess – and the oven does all the work.

IMG_4501

Salsiccia Risotto

SALSICCIA RISOTTO

INGREDIENTS

  • 4 – 5 links hot Italian sausage
  • 1 Tblspn olive oil
  • 1/2 red bell pepper, roughly chopped
  • 1/2 green bell pepper, roughly chopped
  • 2 clove garlic, minced
  • 1 small onion, chopped
  • 1 cup Riso or Arborio rice
  • 2 cups chicken stock
  • 1 cup dry white wine (or additional cup of chicken stock)
  • 1 cup canned tomatoes, chopped
  • Freshly ground black pepper

DIRECTIONS

Preheat oven to 400F.
Heat the oil in a heavy, ovenproof skillet on medium-high. Add the onions and sautée until translucent. Add garlic and cook until aromatic, about 1 minute.
Squeeze sausage meat from their casings into the pan along with the bell peppers and cook stirring occasionally for 5 minutes until vegetables begin to brown.
Add rice and sautée, stirring for 1 minute. Stir in stock, wine (if using) and tomatoes and bring to a boil while loosening any brown bits.
Transfer skillet to the oven and bake uncovered for 25 – 35 minutes, or until most of the liquid is absorbed. Season with several grinds of black pepper.

MONDAY

There’s nothing more mouthwatering than Thai flavors. I don’t care if it’s the fish-sauce/lime/chili dressings or the peanut/vinegar/chili marinades. This is a great summertime dish that can be barbecued outdoors (or broiled in the oven as we all yearn for Summer to get here already!)

IMG_4508

Chicken Satay with Cucumber Pineapple Salad

GRILLED CHICKEN SATAY

INGREDIENTS

  • 1/2 cup peanut butter
  • 1/2 cup peanut oil
  • 1/4 cup white vinegar
  • 1/4 cup Tamari (or light Soy sauce)
  • 1/4 cup fresh lemon juice
  • 4 cloves garlic minced
  • 8 cilantro sprigs
  • 1 whole dried red chili pepper or 2 tsps dried red pepper flakes
  • 2 tsps chopped fresh ginger
  • 10 wooden kebab skewers
  • 4 chicken breasts cut into strips

DIRECTIONS

Combine the first 9 ingredients in a blender or food processor. Blend well to emulsify, adding a few drops of water if the mixture is too thick.
Divide the mixture and use 1/3 to marinate the chicken strips for 4 hours or overnight in a Zip-lock bag.
Store the other 2/3 separately for dipping.
Bathe the skewers in water for at least 2 hours. Thread the skewers with the chicken strips. Grill or broil until browned on both sides.
Serve with dipping sauce.


CUCUMBER PINEAPPLE SALAD

INGREDIENTS

For the Salad:

  • 1 to 1 1/2 cups pineapple (fresh or canned chunks)
  • 1 English cucumber (or 1 medium field cucumber)
  • 3 spring onions, thinly sliced on the bias
  • 1 red bell pepper, julienned
  • 1/2 cup dry whole roasted unsalted peanuts (plus extra for garnish)
  • 1 cup fresh cilantro
  • 1/2 cup fresh basil leaves, roughly chopped

For the Dressing:

  • 2 cloves garlic, minced
  • 1 red chili, de-seeded and minced, or 1 tsp. chili sauce
  • 1 tblspn soy sauce
  • 1 tblspn fish sauce
  • Juice of 1/2 lime
  • 2 tsp brown sugar

DIRECTIONS

Whisk the dressing ingredients thoroughly in a jug and set aside.
Peel and halve the cucumber lengthwise. Slice into 1/4” half-moons or chunks and add to a large bowl.
Add the red pepper, pineapple chunks, spring onion, peanuts, most of the basil and cilantro, (putting aside a little of each for the garnish.
Add the salad dressing and toss well to combine.
Serve on a platter and garnish with the extra herbs and nuts.

TUESDAY

This astoundingly flavorful recipe originates from Jamie Oliver. Just a few simple ingredients and little marinating time transform a piece of oven-roasted Salmon into an Asian masterpiece.

IMG_4511

Asian ginger Salmon

ASIAN GINGER SALMON

INGREDIENTS

  • 2 lemongrass stems (pale parts only) chopped.
  • 1/2 cup light soy sauce
  • 1/2 bunch cilantro leaves, thinly sliced
  • 4 garlic cloves, finely grated.
  • 1″ piece of ginger finely grated.
  • 2 pieces of skinless salmon filet, pin-boned (around 1/2lb each)
  • 1/3 cup honey, warmed
  • 4 spring onions, finely shredded
  • 2 limes halved

DIRECTIONS

Using a mallet or a pestle and mortar, bash the lemon-grass until fragrant. Stir in the soy sauce, ginger and garlic. Place the fish in a glass dish, then spread all over with the marinade. Cover and marinate in the fridge for 1 hour.
Preheat oven to 400 deg and line a large baking tray with parchment paper.
Wipe off the excess marinade with your hands and place the salmon on the tray, then brush with the honey.
Bake for 10 minutes or until the fish is just cooked but still a little pink in the center.
Carefully transfer the fish to a board or serving platter, sprinkle with spring onion and cilantro leaves, then serve warm or at room temperature with lime to squeeze.


WEDNESDAY

This incredible crowd-pleaser is both fragrant and downright numbingly spicy, but you can regulate the heat as you dare. As far as the noodles go, you can make them yourself (they are called “Biang Biang” due to the sound they make as you stretch and slap them onto an oiled surface before splitting them into 3-foot continuous belts and then boiling them) or you can opt for far less clean-up time with purchased Asian noodles or Korean rice cakes. It really doesn’t matter because it’s all about the sauce.

IMG_4517

Dan-Dan Noodles

DAN-DAN NOODLES

INGREDIENTS

  • 2 Italian (sweet) sausages
  • 12 Thai red/bird chilies, ground fine
  • ½ cup vegetable oil
  • 2 garlic cloves, sliced thin
  • 1 (1-inch) piece fresh ginger, peeled and sliced thin
  • 1 tablespoon Sichuan peppercorns
  • ½ cinnamon stick
  • 1 star anise pod
  • 2 tablespoons soy sauce
  • 2 tablespoons black vinegar
  • 1 tablespoon toasted sesame oil
  • 1 teaspoon sugar
  • Purchased noodles or Korean rice cakes, cooked al dente
  • 1 tablespoon salt
  • 12 fresh cilantro sprigs, trimmed and cut into 2-inch pieces
  • 6 scallions, sliced thin on bias

DIRECTIONS

Place chilies in large heatproof bowl. Place fine-mesh strainer over bowl and set aside. Combine vegetable oil, garlic, ginger, peppercorns, cinnamon, and star anise pod in small saucepan and heat over medium-high heat until sizzling.

Reduce heat to medium-low and gently simmer until garlic and ginger are slightly browned, 10 to 12 minutes.

While the chili oil cooks, squeeze the sausage from their casings into a medium skillet and cook on medium heat. Using a wooden spoon, break them up into small bits and stir until well-browned. Set aside.

Pour the cooked oil through the strainer into bowl with chilies; discard solids in strainer. Stir chili oil to combine and let cool for 2 minutes.

Stir in soy sauce, vinegar, sesame oil, and sugar until combined. Add cooked sausage and stir briefly.

Add the cooked noodles or rice-cakes and serve garnished with cilantro sprigs and scallions.


THURSDAY

As I try to be as heart healthy as possible (for the most part) (when I remember, that is), I tend to go the Oatmeal route for breakfast. Which makes me hunt tirelessly for ways to vary up a lifeless puddle of gray porridge any way I can. We ordered a slight variation of this at a hotel resort in Palm Springs about 17 years ago, and have been reprising it again from time to time.

IMG_4534

Oatmeal Brûlée

OATMEAL BRÛLÉE

INGREDIENTS

  • 2 ripe bananas
  • Prepared steelcut or regular oatmeal (for 4 servings)

For the vanilla sauce:

  • 1 cup whole milk
  • 3 egg yolks
  • 8 tblspn sugar
  • 1 tblspn vanilla essence

DIRECTIONS

In a small saucepan over medium heat, bring the milk to a simmer.
Meanwhile in a medium bowl, whisk the egg yolks and the sugar together until a ribbon forms when the whisk is lifted out of the mixture.
Whisk constantly while slowly pouring the hot milk into the yolk-sugar mixture.
Return the mixture to the saucepan. Over low heat, stir constantly with a wooden spoon until the mixture thickens. Be careful not to overcook or the eggs will scramble. The sauce is finished when you can dip a spoon into it, the draw your finger over the back of the spoon and have a track remain that is almost free of sauce.
Remove from the heat and stir in the vanilla. This can be made ahead and refrigerated in an air tight container for up to 5 days.

Divide the cooked oatmeal among flat serving bowls. Slice the bananas into discs and lay in a single layer on top of the oatmeal. Pour a thin layer of vanilla sauce to cover the oatmeal and bananas.
Using a brûlée torch, lightly burn the vanilla sauce (alternately, bring the bowls directly under a broiler for a few seconds until evenly brown) and serve immediately.


FRIDAY

Easy, peasy, pudding-in-pie. And oh, so scrumptious are these delightfully citrus-spiked Shrimp rolls.

IMG_4536

Shrimp Brioche

SHRIMP BRIOCHE

INGREDIENTS

  • 1lb baby shrimp, shelled
  • 2 Brioche buns
  • 2 tblspn Sour Cream
  • 1 Lemon
  • 2 Scallions
  • 3 Radishes
  • 2 tblspn Mayonnaise
  • 2 tlblspn fresh Tarragon, chopped
  • 2 oz Arugula
  • 1 Tblspn Butter
  • 2 tspn Olive Oil

DIRECTIONS

Preheat the oven to 400 degrees.
Bring a medium saucepan of lightly salted water to a low simmer. Zest and halve the lemon. Thinly slice the scallions. Thinly slice the radishes. Finely chop the tarragon leaves.
Add the shrimp to the simmering water. Cook until just opaque, 2-3 minutes. Drain and rinse under cold water to cool.
In a large bowl, whisk together 1 Tablespoon sour cream, half the tarragon, and a squeeze of lemon (to taste). Whisk in a large drizzle of oil. Season with salt and pepper.
Halve the brioche rolls and spread them with butter. Place in the oven to toast 3-4 minutes.
If the shrimp are larger, dice into 1-inch pieces. Toss in a medium bowl with the lemon zest, scallions, remaining tarragon, 2 Tablespoons mayonnaise, remaining sour cream and no more than 1 tsp of lemon juice. Season with salt and pepper.
Toss the arugula and radishes into the salad dressing. Season with salt and pepper. Fill each brioche roll with shrimp salad, and top with a bit of arugula radish salad. Serve the remaining salad on the side.


SATURDAY

Another amazing restaurant-quality, meet-the-parents or impress-the-boss worthy dish that dazzles the taste-buds is a favorite on our “keeper” list. And I guarantee that after you taste it,  it will be on yours too. Just don’t overcook the chops.

IMG_4527

Lamb chops au Poivre

LAMB CHOPS AU POIVRE

INGREDIENTS

  • 2 tblspn black pepper corn
  • 1 tblspn coriander seeds
  • 2 tsp brown mustard seeds
  • 1 tsp fennel seeds
  • 1 rack of lamb chops, trimmed and separated
  • 1 tblspn grapeseed oil
  • 1 tblspn butter
  • 2 tblspn chopped shallots
  • 6 tblspn beef stock
  • 1 1/2 tblspn cognac (optional)
  • 4 tblspn Creme fraiche
  • Salt
  • Freshly ground black pepper
  • Fresh rosemary sprigs

DIRECTIONS

Coarsely grind the spices in a pestle and mortar. Coat eat chop with spices on both sides. Cover and refrigerate for 1-3 hours.
Heat oil in a cast iron skillet and cook chops for 4 – 5 minutes on 1 side on medium heat until nicely browned. Turn and cook for another 4 – 5 minutes on the other side. Set aside under a foil tent.
Remove excess fat from pan. Add butter and shallots and cook on low heat. Add cognac (if using) and cook until it has evaporated. Add the beef stock and creme fraiche and cook on medium stirring until sauce has thickened and turned slightly brown. Season with salt and a few generous grinds of black pepper to taste.
Spoon sauce over and around chops and garnish with fresh rosemary sprigs.


Stay safe. Stay sane, but most importantly – stay at home!


My favorite quarantine recipes Part III

IMG_4490

Maryland crab cakes (see next week’s blog for recipe)

Twenty-something days into a seemingly endless isolation, the only real downside to my self-imposed challenge to never repeat the same dish twice for as long as the lockdown lasts is when my semi-smart bathroom scale flashes ONE AT TIME PLEASE! Regardless, week 3 heralded a couple of old faithfuls, a few recently improveds and one or two new entrants to our “keepers” folder.

SUNDAY

We generally stick to at least one vegetarian dinner each week, and I had already planned on making a batch of my perfected-over-time Puttanesca, but the nice thing about this dish is that it can pair with way more than just pasta. In fact, after spotting a handsome pair of wild caught Chilean sea bass steaks, I decided to take a rain-check on the veg rule.

IMG_4455

Puttanesca on grilled Chilean sea bass

PUTTANESCA

Ingredients

  • 2 to 4 chilies de arbol
  • 4 large garlic cloves thinly sliced on a mandolin
  • 3 tblspn olive oil, divided
  • 2 oil packed anchovy fillets, drained and chopped
  • 1 tblspn fresh oregano leaves
  • 2 cups crushed San Marzano tomatoes, drained
  • 3/4 cup Castelvetrano olives, pitted and coarsely chopped
  • 1/2 cup Kalamata olives pitted and coarsely chopped
  • 2 tblspn drained capers
  • 1/2 cup chopped fresh basil

Directions

Heat chili’s, garlic, and 2 tablespoons oil in a large deep skillet over medium low. Cook,stirring occasionally until garlic is tender and light golden, about five minutes.
Add anchovies and oregano, cook, breaking up anchovies using the back of a spoon, until garlic is golden and mixture is fragrant, about 1 minute and 30 seconds.
Add tomatoes bring to a simmer over medium. Simmer, stirring occasionally until flavors all melded and sauce thickens, about 10 minutes. Remove and discard chilies. Stir in olives and capers and cook for another 10 minutes on medium-low heat.
Remove from heat. Add basil and remaining 1 tablespoon oil, toss to coat.

MONDAY

Most pork chop recipes include some concoction of apple or apple-derivatives. While many of them might be good, nice and fine…good, nice and fine are all four-letter words. Instead, I dare you to try this wonderfully sublime (and new to me) Ginger-scallion relish. You’ll quickly forget how to spell appel.

IMG_4457

Ginger-scallion relish on grilled bone-in pork chop

GINGER-SCALLION RELISH

Ingredients

  • 6 scallions, white and green parts separated and sliced thin
  • 2 teaspoons grated fresh ginger
  • ½ teaspoon ground white pepper
  • ½ teaspoon grated lime zest plus 2 teaspoons juice
  • ¼ cup vegetable oil
  • 2 teaspoons soy sauce

Directions

Combine scallion whites, ginger, pepper, and lime zest in heatproof bowl.
Heat oil in small saucepan over medium heat until shimmering.
Pour oil over scallion mixture. (Mixture will bubble.) Stir until well combined.
Let cool completely, about 15 minutes.
Stir in scallion greens, lime juice, and soy sauce.
Let mixture sit for 15 minutes to allow flavors to meld.


TUESDAY

Another smashing new-to-me recipe for a rather classic dish is a wonderfully garlicky, buttery Linguine in White Clam sauce that makes you forget how long it’s been since you stepped a bare foot onto a soft, sandy beach. BTW, you don’t have to use fresh clams in the shell, but I just happen to think they make this dish look that much sexier.

IMG_4466

Linguine with white clam sauce

LINGUINE WITH WHITE CLAM SAUCE

Ingredients

  • 1 tblsp butter
  • 2 – 3 tblsp olive oil
  • 4 or more large garlic cloves, crushed or minced
  • 1/3 cup white wine
  • 8oz chopped frozen clams (thawed)
  • (I also like to include a handful of fresh clams in their shells for garnish)
  • 1-2 bottles of clam juice
  • 1/3 cup grated Parmesan cheese with more for serving
  • 1/4 cup chopped parsley with more for serving
  • 1 lb linguine pasta
  • Salt to taste
  • Freshly ground black pepper
  • 1/2 tsp red pepper flakes

Directions

Bring a large pot of salted water to boil. Cook the pasta al dente according to the package directions.

(If using fresh clams in their shell, steam them until they all open, about 7 – 10 minutes. Set aside.)

Rinse the thawed clams in a strainer and then add them to a small pot of simmering broth, water or clam juice. Cook for no more than 2 minutes, drain and set aside.
(If using tinned cooked clams, separate the clams from their juice.)

In a large saucepan heat butter and olive oil, add garlic, cook for approx 1 to 2 minutes until aromatic. Add bottled clam juice and white wine to the pan. Add salt and pepper to taste and allow the sauce to simmer. Add red pepper flakes.

Remove from heat and finally add the cooked (or tinned) clams to get them warm and coated in the sauce.

Drain pasta, and add back to the pot on medium-low heat. Pour the sauce mixture over the pasta, add grated cheese, salt, pepper and parsley and stir until nicely combined.
Serve in a bowl with a sprinkle of additional cheese and parsley and some baguette slices to mop up the extra sauce.

WEDNESDAY

I can barely remember when “Wednesday Wings” used to be a thing. But unlike their upstate cousins from Buffalo, these Crispy Peppercorn Chicken Wings don’t require all that deep frying (–twice, if you want them extra crispy). These are baked and then broiled in the oven. The secret is in the spice mixture.

IMG_4459

Crispy Peppercorn Chicken Wings

CRISPY PEPPERCORN CHICKEN WINGS

Ingredients

  • 2 tablespoons black pepper corns
  • 1 tablespoon kosher salt
  • 1 tablespoon ground coriander
  • 1 tablespoon ground cumin
  • 1½ teaspoons garam masala or Chinese five-spice powder
  • ½ teaspoon baking soda
  • ½ teaspoon sugar
  • 3 pounds chicken wings, flats and drumettes separated, patted dry with paper towels
  • 2 tablespoons olive oil
  • 2 scallions
  • 1 lime

Directions

Crush peppercorns in a pestle and mortar or with the bottom of a saucepan in a baking sheet.
Add salt, coriander, cumin, garam masala, baking soda, and sugar to bowl with peppercorns and mix with your hands to make sure all spices are intermingled.

Add chicken wings and oil and toss with your hands until wings are evenly coated. Chill, uncovered for at least 1 hour and up to 1 day.

Arrange wings on prepared sheet, spacing then apart and them let sit until they’ve lost the chill of the fridge and are as close to room temperature as possible, at least 15 minutes. Meanwhile, preheat the oven to 425°. You’re going to bake and then broil the wings so they get extra crispy, so make sure you have one rack aset closer to the broiler

Bake wings on center rack, removing sheet halfway through and turning wings over with a pair of tongs, until browned and crisp in spots and cooked through, 30–40 minutes.

Remove baking sheet from oven and turn on broiler; let heat at least 5 minutes. Broil wings on top rack until browned and crisp all over and nubs on ends of drumettes are just a little charred for about a minute. Remove from oven and turn wings again.
Broil until second side looks as crisp and lightly charred as the first, also about 1 minute. Let rest about 5 minutes.

While the wings are resting, thinly slice scallions and cut lime into wedges. Arrange wings on a platter and scatter scallions over. Serve with lime wedges alongside.

THURSDAY

Just because I haven’t shared any breakfast recipes so far doesn’t mean that I don’t partake in one of the three most important meals of the day. This Oven-baked Steelcut oats has to be one of the strangest preparations of oatmeal ever. I “borrowed” the recipe from a seaside resort café where the (high, drunk or both) chef might have intended to make oatmeal cookies but threw in steelcut oats by mistake. The happy accident is a nutty, chewy, cookie-esque version of Grape nuts. Serve with plain yogurt, berries and (last week’s) Lemon curd.

IMG_4463

Oven-baked Steelcut Oats

OVEN-BAKED STEELCUT OATS

Ingredients

  • 1 cup Steelcut oats
  • 1 Tblspn brown sugar
  • 1/2 tsp ground cinnamon
  • 1/2 tsp baking powder
  • 1/4 tsp salt
  • 2 Tbslpn melted butter
  • 1/2 cup whole milk
  • 1 egg, beaten
  • 1/2 tsp vanilla extract

Directions

Preheat the oven to 350 degrees.
Stir first 5 dry ingredients together and mix well.
Beat the wet ingredients and fold into the dry until well moistened.
Pour the mixture into a medium sized, greased baking dish.
Bake for 30 minutes and then using a spatula, chop it up into very small chunks and stir it around. Bake for another 15 minutes, continue to chop it up and let cool. Store in an airtight container and refrigerate for up to a week.
To serve warm, saute briefly in a skillet with a little butter. Serve with a very generous dollop of plain yogurt, blueberries and lemon curd (essential).
Or you can serve it cold with whole milk or almond milk.


FRIDAY

Here’s a question for you: What’s the difference is between an Austrian Wienerschnitzel and a Japanese Tonkatsu? Both involve pounded, crumbed and fried veal, pork or chicken. But because that they are both equally delicious, does anyone actually care what the difference is? The key is what you pair them with. This recipe works just as well for any of the above proteins, but the secret is in the dark-and-sassy Tonkatsu dip – plus these amazingly crispy quick-pickled cucumbers.

IMG_4475

Chicken Tonkatsu with Japanese pickled Cucumbers

CHICKEN TONKATSU WITH JAPANESE PICKLED CUCUMBERS

Ingredients

For the pickled Cucumbers:

  • ½ pound small Kirby cucumbers, sliced into 1/4-inch-thick rounds
  • 1 teaspoon coarse kosher salt, more for seasoning
  • 1 ¼ teaspoons sugar
  • 2 tablespoons sliced scallions
  • 2 teaspoons rice wine vinegar
  • 1 tablespoon minced shiso or basil
  • 1 teaspoon soy sauce
  • 1 teaspoon toasted Asian sesame oil

For the Tonkatsu:

  • 8 thin slices chicken breast medallions
  • 3 eggs, lightly beaten
  • 1 tsp worcestershire sauce
  • 1 tsp tomato paste
  • 2 cups panko crumbs
  • ½ cup flour
  • Black pepper
  • Peanut or vegetable oil, for frying

For the Tonkatsu sauce:

  • 2 Tblspn tomato sauce
  • 3 Tblspn Worchestershire Sauce
  • 1 1/2 Tblspn Oyster sauce
  • 1 tsp sugar
  • 1 tsp lemon juice

Directions

Place the cucumbers in a colander set over a bowl. Toss them with 1 teaspoon salt and 3/4 teaspoon sugar.
Mix the Tonkatsu sauce ingredients in a small bowl and set aside for serving.
Place one piece of chicken at a time into a Zip-lock bag. Pound the meat to 1/8-inch thickness.
Place eggs in a large shallow bowl; whisk in the Worcestershire and tomato paste. Place the panko crumbs and flour in two separate shallow bowls.
Season cutlets with salt and pepper. Dip each cutlet in the flour (tap off excess), the egg mixture (ditto), then dredge in the panko.
Heat a large pan, pour in 1/8 inch of oil and heat for 30 seconds. Working in batches, put cutlets in the pan. Immediately shake and tilt it so the oil rolls over the chicken in waves (this will give it a lighter, crisper crust). Shake the pan occasionally, until cutlets are golden on the bottom, about 3 minutes. Flip them and shake again. Cook 2 to 3 minutes longer. Transfer to a paper-towel-lined platter to drain.
Pat the cucumbers dry with paper towels. Toss with scallions, vinegar, shiso (or basil), soy sauce, sesame oil and 1/2 teaspoon sugar. Serve cutlets with pickled cucumbers and sauce on the side.


SATURDAY

A wonderfully rustic variation from serving meat ragu with pasta is to pile it on top of a mound of steaming, fresh polenta. This Beef short-rib Ragu cooks for a good 2+ hours in the oven before falling apart and yielding to mouthwatering tomato-ey, garlicky and umami flavors. Don’t forget a sprinkle of freshly grated Parmesan.

IMG_4481

Beef short-rib Ragu

BEEF SHORT-RIB RAGU

Ingredients

  • 1 ½ cups beef broth
  • ½ ounce dried porcini mushrooms, rinsed
  • 1 tablespoon extra-virgin olive oil
  • 1 onion, chopped fine
  • 2 garlic cloves, minced
  • 1 tablespoon tomato paste
  • 3 anchovy fillets, rinsed, patted dry, and minced
  • ½ teaspoon five-spice powder
  • ½ cup dry red wine
  • 1 (14.5-ounce) can whole peeled tomatoes, drained with juice reserved, chopped fine
  • 2 pounds boneless beef short ribs, trimmed
  • ¾ teaspoon table salt

Directions

Adjust oven rack to middle position and heat oven to 350 degrees. Microwave 1/2 cup broth and mushrooms in covered bowl until steaming, about 1 minute. Let sit until softened, about 5 minutes. Drain mushrooms in fine-mesh strainer lined with coffee filter, pressing to extract all liquid; reserve liquid and chop mushrooms fine.

Heat oil in Dutch oven over medium heat until shimmering. Add onion and cook, stirring occasionally, until softened, about 5 minutes. Add garlic and cook until fragrant, about 1 minute. Add tomato paste, anchovies, and five-spice powder and cook, stirring frequently, until mixture has darkened and fond forms on pot bottom, 3 to 4 minutes. Add wine, increase heat to medium-high, and bring to simmer, scraping up any browned bits. Continue to cook, stirring frequently, until wine is reduced and pot is almost dry, 2 to 4 minutes. Add tomatoes and reserved juice, remaining 1 cup broth, reserved mushroom soaking liquid, and mushrooms and bring to simmer.

Toss beef with ¾ teaspoon salt and season with pepper. Add beef to pot, cover, and transfer to oven. Cook for 1 hour. Uncover and continue to cook until beef is tender, 1 to 1 1/4 hours longer.

Remove pot from oven; using slotted spoon, transfer beef to cutting board and let cool for 5 minutes. Using 2 forks, shred beef into bite-size pieces, discarding any large pieces of fat or connective tissue. Using large spoon, skim off any excess fat that has risen to surface of sauce. Return beef to sauce and season with salt and pepper to taste. (Sauce can be refrigerated for up to 3 days or frozen for up to 2 months.)


Stay safe. Stay sane, but most importantly – stay at home!


My favorite quarantine recipes Part II

IMG_4434

Easter (birthday) chocolate cake with cream-cheese frosting

Still in isolation. Still hungry. Still cooking up a storm!

While I do love collecting and perfecting new recipes, it does push some of my old “go-to faves” further and further into the background. But every now and then I make it a point to scroll back and re-discover some of them. It’s a bit like re-connecting with an old school friend on Facebook. You reminisce, you catch up, you wonder why you lost touch…and then you move on to the next new shiny thing. Here are a few new and old hits that made last week especially delicious.


SUNDAY

If you love meatballs and middle-eastern flavors, this recipe for Kofta is an absolute knock-out. Aromatic, nutty, spicy and the bed of lemon-flavored tahini is pure sublimity.

KOFTA MEATBALLS

IMG_4405

Kofta

INGREDIENTS

For the Kofta:

  • 1 lb minced lamb
  • 1 lb minced veal or beef
  • 1 small onion finely chopped
  • 2 large garlic cloves crushed
  • 3/4 cup toasted pine nuts roughly chopped plus extra whole ones to garnish
  • 1/4 cup finely chopped flat leaf parsely plus extra to garnish
  • 1 large medium-hot red chilli, deseeded and finely chopped
  • 1 1/2 tspn ground cinnamon
  • 1 1/2 tspn ground allspice
  • 3/4 tspn grated nutmeg
  • 1 1/2 tspn ground black pepper
  • 1 1/2 tspn salt
  • 2 Tbsp vegetable oil
  • 2 tbsp melted ghee

For the Sauce:

  • 3/4 cup light tahini paste
  • 3 Tblspn lemon juice
  • 1/3 cup water
  • 1 medium garlic clove crushed
  • Sweet paprika to garnish

DIRECTIONS

Put all the kofta ingredients in a large bowl and mix together with your hands. Shape into long torpedo-like fingers. Arrange on a tray and chill until ready to cook for up to 1 day.
Preheat oven to 450 degrees (400 degrees with convection). In a medium bowl whisk together tahini paste, lemon juice, water, garlic and 1/4 tsp salt. The sauce should be a bit runnier than honey. Add 1 or 2 tablespoons of extra water if needed.

Heat sunflower oil in a large frying pan and sear the kofta over high heat. Do this in batches so they aren’t cramped together. Sear until golden brown on all sides – about 6 minutes for each batch.
At this point they should be medium-rare. Lift out of the pan and arrange on a cookie sheet. Finish cooking in the oven on the tray for 5 minutes. Drizzle with melted ghee once you remove them from the oven.
Spoon 3/4 of the tahini sauce on a serving plate and arrange the kofta on top. Drizzle the remaining tahini over the kofta in long, thin streaks.
Garnish with pine nuts, parsely and paprika. Serve immediately.
Serve with pita and cucumber and tomato salad.


MONDAY

For me, eating shrimp is like eating jewelry. And the one thing that shrimp tends to be paired up with most often is garlic. The Portuguese do it a lot. So do the Spanish, and the Italians, and the Greeks and even the Cubans. But here is a Mexican shrimp dish that uses 26 cloves of garlic that get salted, roasted and caramelized with smoked Chipotle peppers.

MEXICO CITY SHRIMP WITH CHIPOTLE MOJO

IMG_4414

Mexico City Shrimp with Chipotle Mojo

INGREDIENTS

  • 2 heads of garlic (about 26 cloves) peeled and crushed
  • 1/2 – 3/4 cup extra-virgin olive oil
  • Kosher salt
  • 1/4 cup fresh lime juice
  • 3 chipotle peppers in adobo sauce, seeded and minced, plus 2 tsp adobo sauce
  • 2 pounds medium shrimp—shelled and deveined
  • Freshly ground pepper
  • Chopped cilantro
  • Lime wedges
  • Grated Mexican cheese
  • Avocado slices
  • Soft shell tortillas

DIRECTIONS

Preheat the oven to 325°. In a small ceramic baking dish, combine the crushed garlic and olive oil with a pinch of salt. Put the dish on a cookie sheet and bake for about 30 minutes, until the garlic is tender and just starting to brown. Stir in the lime juice and bake for about 15 minutes more, until the garlic is golden and very soft. Let the mixture cool slightly.

Using a fork, mash the garlic against the side of the dish and stir to incorporate the oil; the sauce may look like it has separated. Add the chipotle and adobo, season with salt and keep warm.

In a large skillet, heat 2 tablespoons of the garlicky oil from the mojo until shimmering. Add half of the shrimp and a generous pinch each of salt and pepper and cook over moderately high heat, turning once, until golden and just cooked through, about 3 minutes. Transfer the shrimp to a platter. Repeat with 2 more tablespoons of the garlicky oil and the remaining shrimp. Top the shrimp with more garlic and serve with the excess garlic, lime wedges, chopped cilantro, grated Mexican cheese, sliced avocados and warmed tortillas all on the side.


TUESDAY

Just because you can’t go outside shouldn’t mean that you have to divorce yourself from anything barbecued. This pulled chicken slider is a yummy, smoky, vinegary, tomatoey (slightly messy) work of genius that brings the outside inside.

BARBECUE CHICKEN SLIDERS

IMG_4393

Barbecued Chicken Sliders

INGREDIENTS

For the Sauce

  • 1 ½ cups ketchup
  • ¼ cup molasses
  • 2 tablespoons Worcestershire sauce
  • 1 tablespoon hot sauce
  • ½ teaspoon salt
  • ½ teaspoon pepper

For the Chicken

  • 1 cup chicken broth
  • 2 tablespoons molasses
  • 1 tablespoon sugar
  • 1 tablespoon liquid smoke (separated)
  • 1 teaspoon unflavored gelatin
  • Salt and pepper
  • 2 pounds boneless, skinless chicken thighs, halved crosswise
  • Hot sauce

DIRECTIONS

FOR THE SAUCE: Whisk all ingredients together in bowl. Set aside.

FOR THE CHICKEN: Bring broth, molasses, sugar, 2 teaspoons liquid smoke, gelatin, and 1 teaspoon salt to boil in large Dutch oven over high heat, stirring to dissolve sugar. Add chicken and return to simmer. Reduce heat to medium-low, cover, and cook, stirring occasionally, until chicken is easily shredded with fork, about 30 minutes.

Transfer chicken to medium bowl and set aside. Strain cooking liquid through fine-mesh strainer set over bowl (do not wash pot). Let liquid settle for 5 minutes; skim fat from surface. Set aside fat and defatted liquid.

Shred into bite-size pieces with 2 forks. Transfer chicken, 1 cup sauce, ½ cup reserved defatted liquid, 3 tablespoons reserved fat, and remaining 1 teaspoon liquid smoke to now-empty pot. Cook mixture over medium heat, stirring frequently, until liquid has been absorbed and exterior of meat appears dry, about 5 minutes. Season with salt, pepper, and hot sauce to taste. Serve, passing remaining sauce.

Serve the pulled chicken on white bread or hamburger buns with pickles and coleslaw.


WEDNESDAY

If it isn’t obvious yet, I tend to lean towards more flavor-forward dishes. I can’t even spell suttel!? For me, the spicier the better – even on vegetarian night. This crispy potato dish is a relative newbie that rose to “keeper” status after just one bite.

CRISPY POTATOES WITH SPICY AVOCADO SALSA

IMG_4410

Crispy potatoes with spicy Avocado salsa

INGREDIENTS

  • 1 1/2 pounds fingerling potatoes
  • 6 tablespoons olive oil, divided
  • 3 1/2 teaspoons kosher salt, divided
  • 1/2 cup chopped yellow onion
  • 1/3 cup cold water, plus more as needed
  • 1 medium serrano chile, stemmed, seeded (if desired), and roughly chopped
  • 3/4 cup chopped fresh cilantro leaves and stems, divided
  • 2 tablespoons fresh lime juice
  • 1 small avocado, pitted
  • 1/2 cup pickled hot jalapeño slices (such as Mezzetta) plus 1 1/2 tablespoons pickling liquid
  • 2 ounces Cotija cheese, grated on smallest holes of a box grater (about 1/2 cup)

DIRECTIONS

Preheat oven to 350°F. Toss together potatoes, 2 tablespoons oil, and 1 teaspoon salt on a rimmed baking sheet, and spread in a single layer. Bake in preheated oven until fork-tender, 30 to 40 minutes. Remove from oven.

Increase oven temperature to 500°F. Using the bottom of a 1-cup dry measuring cup, smash potatoes to about 1/2-inch thickness. (Make sure smashed potatoes are still in a single layer.) Drizzle with 3 tablespoons oil; sprinkle with 1 teaspoon salt. Bake at 500°F until bottoms of potatoes are golden brown, 15 to 20 minutes. Flip potatoes, drizzle with remaining 1 tablespoon oil, and sprinkle with 1/4 teaspoon salt. Bake until edges of potatoes are crispy and golden, 8 to 12 minutes.

While potatoes bake, process onion, 1/3 cup water, serrano, 3 tablespoons cilantro, lime juice, and remaining 11/4 teaspoons salt in a blender until smooth, about 20 seconds. Add avocado, and process until smooth, about 10 seconds. If needed, pulse in additional cold water, 1 tablespoon at a time, to reach a thick but pourable consistency.

Transfer warm potatoes to a large bowl; add pickled jalapeño slices and pickling liquid, Cotija, and 1/2 cup cilantro; toss to coat. Spoon avocado salsa into 4 small bowls; top evenly with potato mixture, and sprinkle with remaining 1 tablespoon cilantro. Serve immediately.


FRIDAY

Nothing can take your mind off of a virus like a good, strong, creamy and umami curry and rice. Even though there are a few extra steps to this restaurant-quality Chicken Tikka Masala, they are so worth it. Come on. You can do it.

CHICKEN TIKKA MASALA

IMG_4423

Chicken Tikka Masala

INGREDIENTS

  • 1 tablespoon turmeric
  • 1 tablespoon garam masala
  • 2 teaspoons ground coriander
  • 2 teaspoons ground cumin
  • 2 teaspoons kosher salt
  • 1 teaspoon cayenne
  • 6 cloves garlic, minced (separated)
  • 1/2-inch piece fresh ginger, grated
  • 1 cup yogurt (plain, whole-milk)
  • 2 pounds chicken breast, cut into large chunks
  • 2 tablespoons ghee
  • 1 onion, chopped
  • 1 tablespoon tomato paste
  • 5 tomatoes, chopped
  • 3 green cardamom pods
  • 1/2 teaspoon white pepper
  • 1 can coconut milk (separated)
  • Salt to taste
  • 1/2 cup fresh cilantro, chopped
  • Sambals: sliced bananas, peanuts, toasted coconut, cashews, chutney, atchar

DIRECTIONS

Combine the turmeric, garam masala, coriander, cumin, salt and red chile powder to make a spice blend; divide the blend in half. Combine half of the spice blend with 4 minced cloves of garlic, ginger, yogurt and chicken; mix together by hand in a mixing bowl. Transfer to a resealable plastic bag and marinate for at least 6 hours (overnight preferred).

Warm the ghee in a skillet over medium heat. Add the onion and sauté until softened, about 5 minutes. Add the garlic and sauté until aromatic, another minute. Add the tomato paste, tomatoes, cardamom pods, white pepper and the other half of the spice blend. Stir to combine, then reduce heat to medium-low and gently simmer until dark and thick, about 40 minutes.

While the sauce is darkening, prepare the chicken. Skewer the chicken pieces and grill over direct high heat until cooked through, about 3 minutes per side, flipping once. Alternatively, broil in the oven, about 6 to 8 minutes per side. Allow the chicken to rest for 10 minutes, then remove from the skewers and set aside.

Once the sauce is dark, transfer to a blender and add 1 cup of the coconut milk. Blend until smooth. Return to the skillet, straining through a mesh strainer to catch the cardamom shells and tomato skins. Stir in the rest if the coconut milk; return to a simmer and cook until slightly darkened, about 10 minutes. Taste and add salt if needed.

Stir in the cilantro and chicken pieces and allow to simmer for another minute before serving.
Serve with Basmati rice and as many sambals as you like on the side.


ANY DAY

If the first sign of insanity is doing the same thing over and over again expecting a different result, then why, oh why do we eat store-bought Lemon curd? If something so pure has a shelf-life longer than a bad mood, then don’t be surprised if all you can taste are the preservatives, stabilizers, thickeners, artificial sweeteners, flavors and colors. I dollop my home-made Lemon curd on just about everything. Toast, yogurt, oatmeal, banana bread, heck I’d even put it on the lid of an Amazon delivery box, if I there was nothing else to eat.

HOME-MADE LEMON CURD

IMG_4444

Lemon curd

INGREDIENTS

  • 4 Lemons, zested and juiced
  • 1/4 lb butter, cut into small pieces
  • 4 large eggs
  • 2 cups sugar

DIRECTIONS

Melt the butter slowly in a double boiler. Lightly beat the eggs and add to the butter with the lemon juice and zest. Stir slowly but immediately with a whisk to blend the ingredients.
Add the sugar while continuing to stir until well mixed.
Allow to cook slowly and gently for 30 – 45 minutes or until it coats the back of the spoon. (Do not overheat or the eggs will scramble.) Strain the curd into a jug, and pour into warm jars and cover. Refrigerate and use within a month.


Stay safe. Stay sane. Stay inspired. But above all, stay at home.

My favorite quarantine recipes Part I

IMG_4386

Afternoon tea with Pistachio and Hazelnut paste toast triangles

As the inevitability of an extended isolation drags on and on, I find that no matter how I try to vary my habits around the house (spending time in different rooms, sitting on different chairs, looking out of different windows etc.) eventually it all starts to look and feel like more and more and more of the same. But the kitchen is the one place I can truly change things up with each passing meal. I made a promise at the start of the virus outbreak that no matter how long social distancing lasts, I will never cook the same meal twice. And so here are a few of my favorites so far.

SUNDAY

CHINESE-STYLE BARBECUE SPARE RIBS

IMG_4360

Chinese-style barbecued Spareribs

INGREDIENTS

  • 1 (6-inch) piece fresh ginger, peeled and sliced thin
  • 8 garlic cloves, peeled
  • 1 cup honey
  • ¾ cup hoisin sauce
  • ¾ cup soy sauce
  • ½ cup Chinese rice wine or dry sherry
  • 2 teaspoons Chinese five-spice powder
  • 1 teaspoon red food coloring (optional)
  • 1 teaspoon ground white pepper
  • 5 – 6 pounds pork spareribs (2 racks, 2 1/2- to 3-pounds each), preferably St. Louis-style, cut into individual ribs
  • 2 tablespoons toasted sesame oil

DIRECTIONS

  1. Pulse ginger and garlic in food processor until finely chopped, 10 to 12 pulses, scraping down sides of bowl as needed. Transfer ginger-garlic mixture to Dutch oven. Add honey; hoisin; soy sauce; ½ cup water; rice wine; five-spice powder; food coloring, if using; and pepper and whisk until combined. Add ribs and stir to coat (ribs will not be fully submerged). Bring to simmer over high heat, then reduce heat to low, cover, and cook for 1¼ hours, stirring occasionally.
  2. Adjust oven rack to middle position and heat oven to 425 degrees. Using tongs, transfer ribs to large bowl. Strain braising liquid through fine-mesh strainer set over large container, pressing on solids to extract as much liquid as possible; discard solids. Let cooking liquid settle for 10 minutes. Using wide, shallow spoon, skim fat from surface and discard.
  3. Return braising liquid to pot and add sesame oil. Bring to boil over high heat and cook until syrupy and reduced to 2½ cups, 16 to 20 minutes.
  4. Set wire rack in aluminum foil–lined rimmed baking sheet and pour ½ cup water into sheet. (This prevents the ribs from drying out) Transfer half of ribs to pot with braising liquid and toss to coat. Arrange ribs, bone sides up, on prepared rack, letting excess glaze drip off. Roast until edges of ribs start to caramelize, 5 to 7 minutes. Flip ribs and continue to roast until second side starts to caramelize, 5 to 7 minutes longer. Transfer ribs to serving platter; repeat process with remaining ribs. Serve.


MONDAY

CHICKEN MARSALA

IMG_4362

Chicken Marsala

INGREDIENTS

  • 4 boneless, skinless chicken breasts (about 1 1/2 pound, 680g), cut in half crosswise
  • salt
  • freshly ground black pepper
  • 8 to 10 ounces (230-280g) button mushrooms, stems trimmed and sliced
  • 3 tablespoons (total) olive oil
  • 4 tablespoons (total) unsalted butter
  • 2 large cloves garlic, peeled and minced
  • about 1/3 cup (50g) flour
  • 1/3 cup (80ml) chicken stock or water 80ml
  • 1 teaspoon corn starch
  • 2/3 cup (160ml) Marsala wine preferably dry
  • 1 1/2 teaspoons balsamic vinegar
  • 2 tablespoons chopped parsley

DIRECTIONS

  1. Put the chicken pieces between two sheets of plastic wrap, or in a sturdy zip-top freezer bag, and pound them with a rolling pin until they’re 1/2-inch, (1,5cm) thick. Put the pieces in a bowl and season well with salt and pepper. Set aside.
  2. In a wide skillet, melt 1 tablespoon of olive oil and 1 tablespoon of butter over high heat until the butter starts to sizzle. Add the sliced mushrooms, season with salt and pepper, and cook – stirring occasionally – until the mushrooms are seared and cooked through, 6 to 8 minutes. Add the garlic to the mushrooms during the last-minute of cooking.
  3. Scrape the mushrooms onto a plate and wipe the pan clean with a paper towel to remove any bits of garlic. (If not, those bits will burn when frying the chicken.)
  4. To sauté the chicken, spread the flour onto a plate and dredge half of the chicken pieces in the flour, shaking off most of the excess. Heat 1 tablespoon olive oil and 1 tablespoon of butter in the pan. Add chicken pieces so they are in a single layer; don’t crowd them in the pan. (If you have a very large pan, you can sauté them all in one batch. But I use a 10-inch/23cm skillet, and do them in two batches.) Sauté the breasts, turning them over midway during cooking, until they are browned on each side. (They don’t need to be completely cooked through at this point.) When browned, remove the chicken pieces to a separate plate and heat another 1 tablespoon of oil and 1 tablespoon of butter in the pan, and sauté the rest of the chicken.
  1. While the chicken is cooking. Stir the corn starch into the stock or water until it’s completely dissolved, then mix it with the Marsala.
  2. When the second batch of chicken is done and removed from the pan, pour about one-third of the Marsala mixture into the pan, scraping the pan with a wooden or silicone spatula to scrape up the browned bits, then add the rest of the Marsala mixture, as well as the mushrooms and chicken pieces.
  3. Cook the chicken and mushrooms with the sauce over medium heat, turning the chicken pieces over occasionally, to make sure they’re well-basted in the sauce, until the chicken is cooked and the sauce has thickened, about 5 to 6 minutes. Remove from heat and stir in another 1 tablespoons of butter, the balsamic vinegar, and chopped parsley. Taste the sauce and season with more salt, if necessary.

Serving: Chicken Marsala is best served with warm, with wide noodles or another pasta. Mashed potatoes would work well, too.

TUESDAY

GARLIC-GINGER-TOMATO CAULIFLOWER (OR CHICKEN) STIR FRY

IMG_4355

Ginger-Garlic-Tomato Cauliflower stir-fry

INGREDIENTS

  • 1 head roasted cauliflower floretsor 1 ½ pounds boneless chicken, preferably dark meat, in 1/2- to 1-inch chunks
  • ½ cup flour to dredge the chicken
  • 4 tablespoons neutral oil, like corn or canola
  • Salt and pepper
  • 2 tablespoons slivered garlic
  • 2 tablespoons slivered ginger
  • ¼ teaspoon cayenne pepper, or to taste
  • 1 cup ketchup

DIRECTIONS

Toss chicken with flour so that it is lightly dusted. Put 2 tablespoons oil in a large skillet, preferably nonstick, and turn heat to high. When oil smokes, add chicken in one layer. Sprinkle with salt and pepper.

When chicken browns on one side, toss it and cook until just about done: smaller pieces will take 5 minutes total, larger pieces about 10. Remove to a plate. Turn off heat and let pan cool for a moment.

Add remaining oil to pan and turn heat to medium high. Add garlic, ginger and cayenne pepper and cook, stirring, about 2 minutes. Add ketchup and stir; cook until ketchup bubbles, then darkens slightly. Add chicken (or roasted cauliflower) to pan and stir to coat with sauce. Taste and adjust seasoning, then serve.


WEDNESDAY

PENNE OR FARFALLE WITH PISTACHIO CREAM AND SHRIMP

IMG_4367

Penne with Pistachio cream and shrimp

INGREDIENTS

  • 8 ounces Farfalla or Penne pasta
  • 1/2 medium white or yellow onion, chopped
  • 1/4 cup ground pistachios (unsalted, ground in a food processor)
  • 2 tablespoons olive oil (plus a little extra)
  • 1lb shelled shrimp
  • 1/2 cup heavy cream
  • crushed red pepper, to taste
  • salt, to taste
  • fresh ground black pepper, to taste

DIRECTIONS

1. Bring a pot of salted water to boil.

2. In the meantime, chop onion and grind the pistachios in a food processor until the pieces are very small but not completely uniform. Add pasta to water and boil according to package directions.

3. While pasta is cooking, begin sauce: heat olive oil in a medium saute pan, add onion and cook until translucent but not browned.

4. Add pistachios and enough oil to moisten them (if needed). It should be a paste-like consistency. Cook, stirring, over medium heat for about one minute (do not let the pistachios take on any color). Add the shrimp and cook on both sides until just done.

5. Add cream, stir until heated through, then remove from heat. Add a pinch of crushed red pepper, black pepper and plenty of salt to taste.

6. When pasta is al dente, drain well then add to the saute pan with the sauce. Toss well to coat and serve immediately with lots of fresh grated Parmigiano Reggiano.


FRIDAY

MISO-MARINATED SALMON

IMG_4381

Miso-marinated Salmon

INGREDIENTS

  • ¼ cup white miso paste
  • 2 tablespoons sugar
  • 1 ½ tablespoons sake
  • 1 ½ tablespoons mirin
  • 2 (6- to 8-ounce) skin-on salmon fillets
  • Lemon wedges

DIRECTIONS

1. Whisk miso, sugar, sake, and mirin together in medium bowl until sugar and miso are dissolved (mixture will be thick). Dip each fillet into miso mixture to evenly coat all flesh sides. Place fish skin side down in baking dish and pour any remaining miso mixture over fillets. Cover with plastic wrap and refrigerate for at least 6 hours or up to 24 hours.

2. Adjust oven rack 8 inches from broiler element and heat broiler. Place wire rack in rimmed baking sheet and cover with aluminum foil. Using your fingers, scrape miso mixture from fillets (do not rinse) and place fish skin side down on foil, leaving 1 inch between fillets.

3. Broil salmon until deeply browned and centers of fillets register 125 degrees, 8 to 12 minutes, rotating sheet halfway through cooking and shielding edges of fillets with foil if necessary. Transfer to platter and serve with lemon wedges.s

Stay safe. Stay sane, but most importantly – stay at home!


Veronika, review

IMG_4022

Veronika

The group that brought you Upland, Le Coucou, The Clocktower and Pastis just unveiled their latest scene-stealer – Veronika. Named for the patron saint of photography and located on the second floor of the newly debuted Swedish photo-museum Fotografiska, this über-elegant dining room with unfathomably high ceilings, elaborate brass candelabras, solid marble tables, Fabergé egg-shaped lamps, touches of gold in the tiles and wall panels, speckles of white marble mosaic here and there between the oak floors is going to be the next match that sets the Flatiron dining district on fire once and for all.

IMG_4017

Veronika

After your eyes adjust to the caramel-colored ambiance, you’re confronted with an impressive beaux arts bar pyramiding upwards well out of the bar tenders’ reach but still not quite touching the ever-evasive ceiling. You forget you’re on Park Avenue South and for a solid minute you can’t help waxing sentimental about one of Vienna’s grand coffee houses like Landtmann, Schwartzenberg, Diglas or Central.

IMG_4024

Poppyseed milk bread with butter and dill oil, Veronika

But Veronika is not just Viennese. What she lacks in dusty nostalgia and disdain for the bourgeoisie, she more than makes up for in gold leaf and polish. Fortunately, Stephen Starr is far too hip to cutesify the space with odious waltzes or operatic orchestrations, and so the cool rock track keeps things somewhat unexpected and undefinable.

IMG_0238

Potato Pierogi, Veronika

As is fairly customary these days, the magnificently gilded Rosenthal porcelain chargers are removed almost immediately, but they get replaced by even larger and more elaborate versions of themselves which encircle Instagram-able dish after Instagram-able dish in meticulous baroque frames. The silverware feels well-worn, heavy and historic, as if this very knife and fork have been cutting schnitzels and piercing goulash for a good hundred years.

IMG_4027[1]

Chicken Kiev, Veronika

The menu connects central and eastern Europe as effectively as a night train from Paris to Budapest – with border stops in Zurich, Vienna and Berlin along the way. I’d define this as the quintessential cold-climate restaurant with shamelessly hearty dishes like a soft and foamy cheese Souffle Suissesse freed from its ramekin and drenched in a decadent gruyere-laden sauce Mornay, or a scattering of soft-as-ravioli Potato Pierogis that take on a royal austerity when dolloped with a jolt of whipped caviar cream, or a perfectly fluffy pillow of Wiener Schnitzel that breathes a sigh of delight when you pierce it’s golden crumbed balloon, or the way the never-ending puddle of parsley-flecked melted garlic butter dribbles out of the immaculately sealed torpedo of Chicken Kiev nestled against a floral garnish of pomme purée. Even though this kitchen appears to be drowning in continental confidence, it’s hard to find a flaw.

IMG_0241

Wiener Schnitzel, Veronika

The four cakes that make the rounds from table to table via a glass and brass trolley include a tidy but predictable Lemon Tart which felt a tad home-grown for such European surroundings, and the Sacher-torte-adjacent referred to as a Viennese Chocolate Cake (leaving dark-brown moustaches all around the room), has been overly Americanized. I’m hoping that with fewer layers, a less bitter chocolate (at least for the glaze) and a brighter Marillen (Austrian apricot) jam filling we might be within lip-smacking distance of one of Austria’s most popular perishable exports.

IMG_4037

Omelette Norvegienne, Veronika

The other three desserts required more kitchen prep including the oddly familiar Omelette Norvégienne, (aka baked Alaska) – clearly on loan to round out the menu from Soho crowd pleaser Le Coucou. The two-man table-side flambee performance is about as dramatic as some of the Klimt-like, gold-framed photography glaring down at us with veiled looks of typically Austrian indifference. “Ah geh bitte” (give me a break already), they seem to whisper under their photogenic breaths. But biting through the gloriously tight froth of rum-toasted meringue into the velvety salsify ice-cream and spice-cake biscuit, who even gives a damn.

IMG_0242

Viennese Chocolate Cake, Veronika

Verōnika


Eating my way through Mexico City

IMG_3549

Fig tart, Contramar

Many cities around the world have a distinctive and singular reputation. In LA just about everything’s related to entertainment. In Washington DC, it’s all about politics. Seattle’s the place for coffee. Nashville is the home of music, while Mexico City is famous for (my favorite of all pastimes) – eating. But food in Mexico is not the same as Mexican food. So, if you’re expecting to read all about the capital of Tex Mex cuisine: the nirvana of nachos, the bliss of burritos, the felicity of fajitas, the ecstasy of enchiladas, stop reading right now!

IMG_3546.jpg

Grilled red snapper, Contramar

Mexico City, the surprisingly sophisticated and largest metropolis in North America (affectionately abbreviated as CDMX – Ciudad de Mexico) buzzes with unique and interesting tastes that reach back through a history of Mayan, Aztec and European influences to deliver some of the most extraordinary and astonishing food in the world. To make it simple, I have broken down my preferences into two categories: Street food and Table food.

Street Food

IMG_3398

Unlike the food truck epidemic ravaging the US, it’s quite common to see rural families who commute 6+ hours a day just to cook their centuries-old specialties over griddles on the sidewalks of CDMX’s historic center, while cars, trucks, motorbikes and organ grinders vroom, rattle, honk and hiss by. Pedestrians can grab a bite on the go, eat standing up, or use an upturned bucket as a make-shift seat under the shade of a piece of tarp with a bag of napkins suspended from hooks above. While the immediate environment for our Tengo Hambre street food tour might not have been the most conducive to savoring, appreciating and relishing, the food itself was utterly sensational. In fact, I’d like to dispense with all the adjectives right now and declare that everything served on the streets of CDMX was equal parts delectable, yummy, mouthwatering, sublime, scrumptious and delicious.

IMG_3346

Tengo Hambre Street Food Tour

We learned early on that Tamales are only requested and eaten during the daytime. Just like Weißwurst in Germany or Cappuccino in Italy, it’s considered a faux pas to order a tamale after midday. In addition, Quesadillas in CDMX aren’t necessarily made with cheese, but they are all oval shaped to differentiate them from their (rounder) taco cousins.

IMG_3354

Deep fried Jalapeño’s stuffed with cheese

We tried Squash blossom, Huitlacoche Mushroom with epazote leaf (which gives it an umami boost), Chipotle short rib, and finally Trumpet mushroom quesadillas. Then came a deep-fried Jalapeño pepper stuffed with cheese and smothered with a lime juice marinated onion and habanero relish.

IMG_3358

Tacos al Pastor, El Hequito

As we continued to walk past the music instrument quarter, the textiles quarter and then right into the heart of the plumbing quarter, we were suddenly surrounded by the best toilets and tacos the city has to offer. El Hequito is a tiny street food chain that has only one item on the menu – Tacos al Pastor. The youngest in the taco family only made their debut in the 1940’s as a reaction to the influx of Lebanese immigrants, as never before would a Mexican dream of carving meat from a shwarma tower. Unlike Al Pastor in other cities, here the pineapple is substituted for sweet onions which catch the drippings from the layers and layers of marinated meat revolving above them.

IMG_3382

Crickets, Mercado San Juan

There are an astounding 800 markets in Mexico City, with 300 of them indoors. Not only does each neighborhood have its own mercado, but some of them cater to specific types of shoppers. The Mercado San Juan is a favorite of chefs and foodies. Here you can find out-of-season ingredients that are imported from all parts of the world to go along with Mexican fruits like Chinco sapote which tastes a bit like a stewed pear, or the Mamey which is a cross between a sweet potato and a papaya, or the Cherimoya or Jack fruit which tastes like an overripe and ultra-sweet papaya. Insects are still a big deal in Mexican cuisine. It’s not uncommon to chew on or cook with worms, ants, scorpions or larvae. Prior to the introduction of livestock, bugs were the only source of protein available to inland Mexicans. At the mercado, we tried Crickets 3-ways (garlic, chili and plain), all equally crunchy and salty as a fistful of popcorn. Ants like Chicatanas however, (much nuttier than crickets) are very rare, as they are only harvested on a single night after the first rain of the season and are therefore eaten with a dose of appropriate solemn appreciation.

IMG_3378

Chorizo Verde, Mercado San Juan

We couldn’t help noticing coils of bright green sausages dangling above several of the butcher stands. These Green chorizo are made with pork, almonds, cilantro, raisins, peanuts and salsa verde and are cooked out of the casing for a highly popular taco, but none more so than the 100+ line outside Los Cocuyos, who serve Masisa (head meat) or Brisket chorizo tacos all day and all night long.

IMG_3422

Brisket chorizo tacos, Los Cocuyos

The last and most filling taco we tasted was called a Tlacoyo. These are grayish oval discs that get a helping of refried beans inserted inside the blue-corn masa which has been nixtamalized (corn detox) before being grilled and topped with meat, salsa and cheese.

IMG_3516.jpg

Churros, Churrería el Moro

And by way of dessert, nothing disappears faster than a bucket of fresh sugar and cinnamon infested mini Churros from Churrería El Moro.

Table food.

IMG_3262

Condensed goat milk tart, Meroma

It’s rather curious that many of the highly desirable restaurants in CDMX are open for breakfast and lunch, but not dinner. Some we asked said that dinner is a less important meal for locals, while others were more inclined to get home to be with their families. As a result CDMX is littered with prolific breakfast options not offered in most other cities. One baked goods standout is Panadería Rosetta.

IMG_3297

Guava pastry, Panadería Rosetta

This staple in the Roma neighborhood churns out all manner of breads, sandwiches and eggs, but the “I’ll have what she’s having” order is for the delectable Guava pastry (a round croissant with a central well of guava preserve and a dollop of cream cheese wedged into the base) or the vanilla/chocolate Concha (a very soft and fluffy brioche with a sugary crust). Just the way to start the day.

IMG_3301.jpg

Fresh chocolate/vanilla conchas, Panadería Rosetta

Every foodie you speak to will have at least 10 go-to favorites for meals in CDMX. I’ll do my best to narrow it down.

IMG_2365

Contramar

Contramar is definitely one of my top 2 – not just because Gabriela Cámara’s athletic waitstaff can turn a table in under 20 seconds or that they literally bolt past you at a sprint for the entire service, but for their Tuna tostadas (who no doubt have their own Facebook account by now) with an amazingly tart aioli, crispy fried onions and avocado, and their signature schizophrenic but sumptuous Grilled red snapper filet which sports a green parsley/garlic salsa on the left side and a red-orange chili on the right, encapsulating the Mexican flag on a plate. Make sure to leave room for their ridiculously hedonistic glazed Fig (cheesecake) tart and a glass of Carajillo – which is the cold Mexican version of a hot Irish coffee.

IMG_7568

Tuna tostadas, Contramar

On a shady corner in Roma Norte, a converted house delivers one mega hit after the other at Bistro Máximo. Three of the French-leaning standouts in chef Eduardo Garcia’s tasting menu that I almost flipped over was a strip of Dominico banana topped with caviar and crème fraiche with a few dots of maple syrup for some unexpected sweetness, a formidable Tuna sashimi with shaved white truffles and a scrumptious Sweet potato-stuffed ravioli.

IMG_3524

Sweet potato-stuffed ravioli, Bistro Máximo

A few blocks away, chef Rodney Cusic serves up a truly inspired local ingredients using international techniques at Meroma. We tried the Roasted carrot salad with grilled cucumbers, wheat berries and an absolutely sublime oregano sesame dressing, rivaled only by the chile manzano dressing that supported a delightful Scallop tiradito with melon, wheat crisps and peppermint oil. Equally spectacular was the roasted lamb with an amazing green fennel sauce and cardamom pesto and the crispy Catch of the day, braised with roasted peppers, grilled cabbage, basil, pine nuts for layer upon flavored layer. I also had to try the surprisingly rich Condensed goat milk tart with whipped cream and chamomile.

IMG_3252

Meroma

And topping my list, chef husband and wife team Saqib and Norma’s fusion bistro Masala y Maiz is an absolute culinary utopia of bold flavors and accents from Mexico, India and East Africa. The menu is riddled with political commentaries and a mixture of family favorite dishes that push the boundaries of geography, stereotype and expectation.

IMG_3677

Samosas de Temporada, Masala y Maiz

According to one of the sous chefs, the Samosas de Temporada sit on a heavenly sauce “made from poppy seeds, curry spices, carrots and God knows what else”.

IMG_3678

Camarones de Pa’ Pelar, Masala y Maiz

The sensational Camarones de Pa’ Pelar are first marinated and then cooked in the Grandma’s special chili and herb mixture – the contents of which were forbidden to reveal. The fried chicken Pollo Frito is marinated in yoghurt overnight and then coated in chickpea flour before being fried in coconut oil and dressed with a herb chutney and a jam of sweet and sour macha chilies. Chef Saqib also promotes a wide variety of “natural” wines that all hail from his personal friends’ vineyards in France, Italy and California.

IMG_3680

Pollo Frito, Masala y Maiz

Widening the field a bit, I would definitely include Yakumanka for their sensational ceviche, Noso for a litany of Basque specialties such as a Vichyssoise served over thick dollop of leek paste and their liquid nitrogen ice-cream, Panadería Ideal for the sheer overwhelming volume of their fresh cake, cookie and pastry selection convenientely located at eye and finger level, and if you happen to snag a reservation for the oh-so-trendily unavailable Pujol or Quintonil, be sure to give them my regards!

http://www.contramar.com.mx/english.html

https://www.masalaymaiz.com/

https://meroma.mx/

Rosetta

index

https://clubtengohambre.com/

http://www.maximobistrot.com.mx/

IMG_3302

Chocolate concha, Panadería Rosetta